
Minecraft OptiFine Emissive Textures: Complete Guide to Glowing Resource Packs, Setup, Creation and Troubleshooting
Minecraft OptiFine emissive textures add glowing details to blocks, items, mobs, and other game elements. These textures remain bright in dark areas without affecting the world’s actual lighting. They create eye-catching visual effects while preserving Minecraft’s familiar style. OptiFine uses a simple overlay system for emissive textures. The standard texture acts as the base, while a matching emissive texture contains the areas that should glow. Minecraft renders these highlighted pixels at full brightness, even at night or inside dark caves. OptiFine uses emissive.properties and the _e file naming convention to identify these textures.
Many players use emissive textures to improve visibility and give resource packs a more dynamic appearance. Resource pack creators can use them to highlight ores, magical items, custom mobs, decorative blocks, armor trims, and other details. These effects can make the game feel more immersive without changing its core gameplay. There is one important limitation to remember: emissive textures do not create real light. They only make selected pixels appear bright. Unlike torches, lanterns, and glowstone, they cannot illuminate nearby blocks or prevent hostile mobs from spawning.
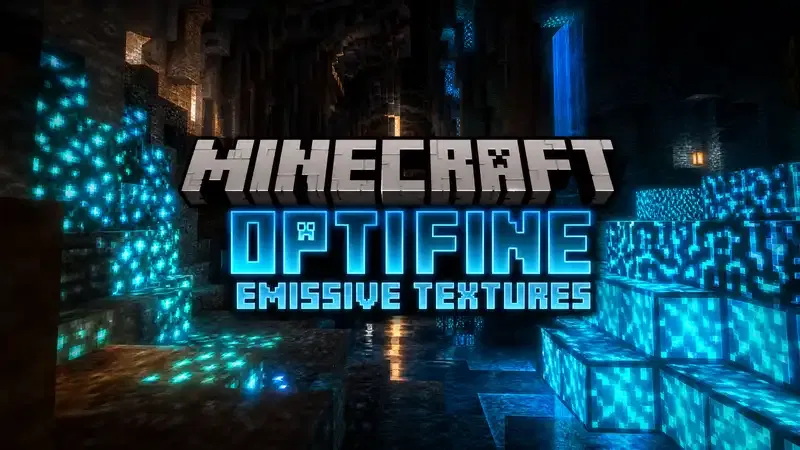
This guide explains how Minecraft OptiFine emissive textures work and how to use them effectively. You will learn how to enable emissive textures, install compatible resource packs, create custom glowing textures, understand supported game elements, and troubleshoot common problems. We will also compare OptiFine’s implementation with related technologies such as Entity Texture Features, Connectedness, and Bedrock PBR. By the end of this guide, you will have a clear understanding of emissive textures and how they can add glowing visual details to your Minecraft world and Minecraft Dynamic Lighting OptiFine.
What Are Minecraft OptiFine Emissive Textures?
Minecraft OptiFine emissive textures add glowing details to existing textures. They use a separate overlay instead of replacing the original texture. This method keeps the base design while making selected areas appear bright. OptiFine renders the emissive overlay at full brightness. This process is called full-bright rendering. The glowing pixels stay bright during the day, at night, and inside dark caves. The overlay sits on top of the base texture.
Only the marked areas glow. The rest of the texture keeps its normal lighting and shading. This approach creates clean and realistic glowing effects without changing the entire texture. Many players think emissive textures produce light. They do not. They only make parts of a texture look bright. They cannot light nearby blocks, stop hostile mobs from spawning, or replace light sources like torches or lanterns.
OptiFine supports emissive textures for many game elements. You can create glowing effects for:
- Blocks, such as ores, lanterns, and decorative blocks.
- Items, including tools, weapons, and custom items.
- Entities, such as mobs with glowing eyes or magical details.
- Player skins with bright accents or glowing clothing.
- Block entities, including chests, beds, shulker boxes, and other supported objects.
- Armor trims, using OptiFine’s supported material suffixes for emissive trim overlays.
This flexible system helps resource pack creators add visual depth without changing Minecraft’s core gameplay. It also keeps packs lightweight because only selected texture areas receive the glowing effect.
How OptiFine Emissive Textures Work
OptiFine creates the glowing effect by combining two texture files. The first file is the base texture. It contains the normal appearance of the block, item, or entity. The second file is the emissive overlay. It contains only the pixels that should glow. During rendering, OptiFine loads the base texture first. It then places the emissive overlay on top. This process is called overlay rendering. The original texture keeps its colors and details, while the overlay adds bright highlights. OptiFine applies a brightness override to the emissive overlay. The glowing pixels always render at full brightness. They stay visible in caves, at night, and in other dark areas.
The overlay uses the same render layer as the base texture. However, OptiFine renders overlays from the SOLID layer as CUTOUT_MIPPED. This behavior helps display glowing pixels correctly. Transparency also affects the final result. Fully opaque pixels appear brightest. Semi-transparent pixels glow less. This creates smooth effects on glass, slime blocks, and other translucent textures.
Texture Pairing
Every emissive texture needs a matching base texture. Both files work together as a pair.
For example:
diamond_ore.png
diamond_ore_e.png
In this example, diamond_ore.png stores the normal texture. The diamond_ore_e.png file stores only the glowing areas. OptiFine combines both files during rendering.
Both files must follow these rules:
- Match dimensions. Both textures must use the same width and height. Different sizes can cause rendering issues or visual artifacts.
- Match location. Store both files in the same folder inside the resource pack. OptiFine searches for the emissive overlay beside the base texture.
- Use identical names. Keep the same base file name and add the emissive suffix. The default suffix is _e, which creates the correct texture pair.
Following these rules ensures that OptiFine finds the overlay and renders the glowing effect correctly.
Emissive Properties Explained
OptiFine uses a simple configuration file to control emissive textures. This file is called emissive.properties. It tells OptiFine how to identify and load emissive overlay textures inside a resource pack.
Place the file in this directory:
assets/minecraft/optifine/
OptiFine reads this file when it loads the resource pack. If the file is missing or incorrect, the game cannot recognize emissive overlays. The emissive.properties file acts as the central configuration for the emissive texture system. Instead of checking every texture manually, OptiFine follows the rules defined in this file.
Understanding suffix.emissive
The most important setting inside emissive.properties is:
suffix.emissive=_e
This line tells OptiFine to look for emissive textures that end with the _e suffix.
For example:
diamond_ore.png
diamond_ore_e.png
OptiFine loads diamond_ore.png as the base texture. It then finds diamond_ore_e.png and renders it as the glowing overlay.
Default Suffix
The default suffix is _e. Most resource packs use this naming convention because it matches the official OptiFine documentation. It also makes packs easier to understand and maintain.
Custom Suffix
You can choose a different suffix if needed.
For example:
suffix.emissive=_glow
This setting changes the file names to:
diamond_ore.png
diamond_ore_glow.png
Use one suffix consistently throughout your resource pack. Mixing different suffixes can prevent OptiFine from finding the correct overlays.
Best Recommendations
Follow these practices for reliable results:
- Keep emissive.properties inside assets/minecraft/optifine/.
- Use the default _e suffix unless you have a specific reason to change it.
- Apply the same suffix to every emissive texture.
- Keep the base texture and emissive overlay in the same folder.
- Test the resource pack after adding new emissive textures.
Common Mistakes
Small errors can stop emissive textures from working. Watch for these common problems:
- Saving emissive.properties in the wrong folder.
- Misspelling suffix.emissive.
- Using different suffixes across the same resource pack.
- Naming the overlay incorrectly, such as diamondore_e.png instead of diamond_ore_e.png.
- Forgetting to create the emissive overlay file.
- Placing the overlay in a different directory than the base texture.
Checking these details usually fixes most emissive texture issues before deeper troubleshooting becomes necessary.
File Naming Convention
OptiFine uses a simple file naming system to match a base texture with its emissive overlay. Every emissive texture must follow this convention. Even a small naming error can prevent the glowing effect from working.
For example:
stone.png
stone_e.png
In this pair, stone.png is the base texture. The stone_e.png file contains only the glowing pixels. OptiFine reads both files together and combines them during rendering.
Understanding the Suffix
The suffix is the extra text added to the end of the base file name. By default, OptiFine uses the _e suffix.
For example:
torch.png
torch_e.png
diamond_sword.png
diamond_sword_e.png
creeper.png
creeper_e.png
If your emissive.properties file uses a custom suffix, every emissive overlay must use that same suffix.
Naming Rules
Follow these rules to ensure OptiFine detects your emissive textures correctly:
- Keep the base file name unchanged.
- Add the emissive suffix before the .png extension.
- Save both files as PNG images.
- Use the exact same capitalization in both file names.
- Keep only one emissive overlay for each base texture.
- Match the file name defined by the original Minecraft texture.
Following these rules helps OptiFine pair the correct textures without errors.
Folder Structure
Store the emissive overlay in the same folder as its base texture. OptiFine searches that location when it loads the resource pack.
For example:
assets/
└── minecraft/
└── textures/
└── block/
├── stone.png
└── stone_e.png
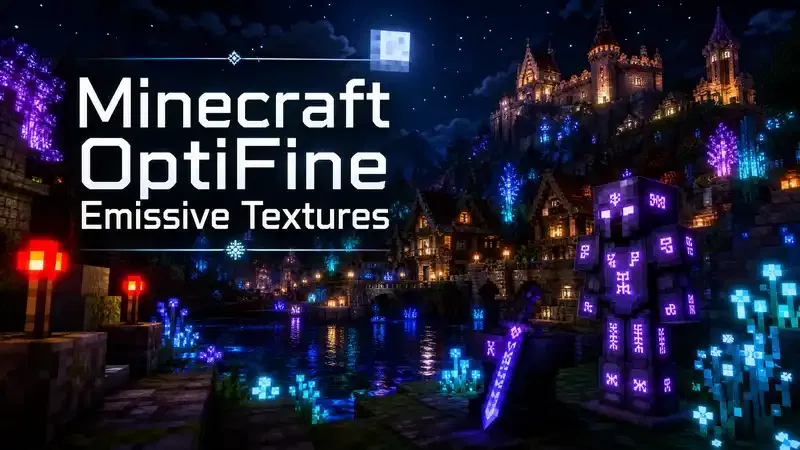
This structure allows OptiFine to find both files and render the emissive overlay correctly.
Supported Directories
OptiFine supports emissive overlays in the same texture directories used by Minecraft. Common locations include:
- assets/minecraft/textures/block/ for blocks.
- assets/minecraft/textures/item/ for items.
- assets/minecraft/textures/entity/ for mobs and entities.
- Other supported texture folders for player skins, block entities, and armor trims.
Keep every emissive overlay beside its matching base texture, regardless of the directory. This consistent organization makes your resource pack easier to manage and reduces configuration mistakes.
Folder Structure
A clean folder structure helps OptiFine find emissive textures without errors. Place every file in its correct location before loading the resource pack.
Here is the basic structure:
assets/
└── minecraft/
├── optifine/
│ └── emissive.properties
└── textures/
├── block/
├── item/
└── entity/
assets
The assets folder is the root directory of every Minecraft resource pack. It stores all textures, models, sounds, and language files used by the pack.
minecraft
The minecraft folder contains the game’s default assets. OptiFine reads this directory to load textures and custom configuration files.
optifine
The optifine folder stores OptiFine-specific features and settings. It supports advanced resource pack functions that vanilla Minecraft does not provide.
emissive.properties
The emissive.properties file controls the emissive texture system. It tells OptiFine which file suffix identifies emissive overlays. Without this file, OptiFine cannot detect glowing textures.
textures
The textures folder contains the image files used throughout Minecraft. Each subfolder organizes textures by their purpose.
textures/block
Store block textures in this folder. Place each emissive overlay beside its matching base texture.
Example:
textures/
└── block/
├── stone.png
├── stone_e.png
├── diamond_ore.png
└── diamond_ore_e.png
textures/item
Store item textures here. Tools, weapons, food, and other inventory items belong in this directory.
Example:
textures/
└── item/
├── diamond_sword.png
└── diamond_sword_e.png
textures/entity
This folder contains textures for mobs and other entities. It also supports emissive overlays for compatible entity textures.
Example:
textures/
└── entity/
├── creeper/
│ ├── creeper.png
│ └── creeper_e.png
└── spider/
├── spider.png
└── spider_e.png
Why This Structure Matters
OptiFine searches for emissive overlays in the same directory as their base textures. If you place a file in the wrong folder, OptiFine cannot pair the textures correctly. A well-organized folder structure also makes your resource pack easier to update, troubleshoot, and expand.
How to Enable Emissive Textures in OptiFine
Enabling emissive textures takes only a few minutes. Before you begin, make sure your resource pack supports OptiFine’s emissive texture system.
Step 1: Install OptiFine
Download and install the OptiFine version that matches your Minecraft version. Launch the game once using the OptiFine profile. This step ensures all OptiFine features load correctly. If you already use OptiFine, verify that it supports emissive textures and matches your resource pack version.
Step 2: Install the Resource Pack
Copy your resource pack into Minecraft’s resourcepacks folder.
Start Minecraft and open:
Options → Resource Packs
Move the resource pack to the Selected column. If you use multiple packs, place the emissive resource pack above any pack that changes the same textures. This priority helps OptiFine load the correct files.
Step 3: Enable Emissive Textures
Open:
Options → Video Settings → Quality
Find the Emissive Textures option and set it to ON.
This setting allows OptiFine to detect the emissive.properties file and render every supported emissive overlay. If you use shaders, confirm that the shader pack supports OptiFine’s emissive texture system. Some shader packs offer separate settings for emissive materials.
Step 4: Reload Resource Packs
Return to the Resource Packs screen and reload your resource pack. You can also press F3 + T to reload all resource pack assets without restarting Minecraft. After the reload finishes, enter a world and test your textures. Visit a dark cave or switch the game to nighttime. The emissive areas should remain bright while the surrounding environment stays dark.
Quick Checklist
Before troubleshooting, confirm these points:
- OptiFine matches your Minecraft version.
- The resource pack supports emissive textures.
- Emissive Textures is enabled in Video Settings.
- emissive.properties exists in assets/minecraft/optifine/.
- Base textures and emissive overlays use the correct file names.
- The resource pack has reloaded successfully.
Completing these steps prepares your game for the next stage, where you can create and customize your own emissive textures.
How to Create Emissive Textures
Creating emissive textures is easier than it looks. You only need a resource pack, a PNG image, and the correct OptiFine setup. Follow these steps to build a texture that glows in Minecraft.
Requirements
Before you begin, gather these items:
- An image editor that supports PNG transparency, such as GIMP, Paint.NET, Photoshop, or Aseprite.
- A Minecraft resource pack.
- PNG texture files from Minecraft or your custom resource pack.
- OptiFine installed in the correct Minecraft version.
Step 1: Create the Base Texture
Start with the original texture you want to modify. This file becomes the base texture.
For example:
diamond_ore.png
Edit the texture if needed, but keep its original dimensions. The emissive overlay must match this size later.
Step 2: Create the Emissive Overlay
Duplicate the base texture and remove everything except the parts that should glow.
For example, you may keep:
- Diamond crystals in ore.
- Spider eyes.
- Magical runes.
- Lantern flames.
- Energy lines on custom blocks.
These remaining pixels become the glowing pixels.
Use transparency for every area that should not glow. A transparent background lets the base texture remain visible underneath. Brightness also matters. Bright colors create a stronger glow. Dark colors still glow, but they appear less vibrant. Choose colors that match your resource pack’s style instead of making every pixel glow. A clean overlay usually looks better than one filled with glowing details.
Step 3: Save Using the _e Suffix
Save the overlay in the same folder as the base texture.
Use the default naming convention:
diamond_ore.png
diamond_ore_e.png
The _e suffix tells OptiFine that the second file is the emissive overlay. If you use a custom suffix, it must match the value inside emissive.properties.
Step 4: Create emissive.properties
Inside your resource pack, create this folder if it does not already exist:
assets/
└── minecraft/
└── optifine/
Create a file named:
emissive.properties
Add the following line:
suffix.emissive=_e
This setting tells OptiFine to search for textures that end with _e.
Step 5: Test in Minecraft
Move your resource pack into the resourcepacks folder and enable it in Minecraft.
Turn on Emissive Textures in Options → Video Settings → Quality.
Reload the resource pack by pressing F3 + T or by reopening the Resource Packs menu. Enter a dark cave or switch to nighttime. The selected pixels should stay bright while the rest of the texture follows normal lighting.
If the texture does not glow, check these items:
- The base texture and overlay share the same dimensions.
- Both files use identical names except for the _e suffix.
- Both files sit in the same folder.
- emissive.properties exists in assets/minecraft/optifine/.
- The suffix.emissive value matches your file names.
- Emissive Textures is enabled in OptiFine.
Once your first texture works, you can repeat the same process for blocks, items, entities, player skins, block entities, and supported armor trims.
Supported Emissive Texture Targets
OptiFine supports emissive textures for many Minecraft objects. This flexibility allows resource pack creators to add glowing details without changing gameplay. Each supported target uses the same emissive overlay system and file naming convention.
Emissive Blocks
Blocks are the most common use for emissive textures. A glowing overlay can highlight important details while keeping the original block design.
Popular examples include:
- Diamond, emerald, and redstone ores
- Lanterns
- Magma blocks
- Redstone components
- Sculk blocks
- Decorative custom blocks
Many creators only make the brightest parts glow. This approach looks more natural than making the entire block bright.
Emissive Items
Items also support emissive overlays. A small glowing accent can make valuable equipment stand out in inventories and while held.
Common examples include:
- Swords
- Pickaxes
- Axes
- Bows
- Magical tools
- Enchanted items
- Custom weapons and artifacts
Keep glowing areas small and purposeful. Too many bright pixels can hide important texture details.
Emissive Entities
OptiFine supports emissive textures for many entities. This feature helps resource packs create unique mobs with glowing eyes, markings, or magical effects.
Popular examples include:
- Spiders with glowing eyes
- Endermen with brighter facial details
- Wardens with enhanced glowing patterns
- Custom mobs with animated or magical accents
Many adventure and fantasy resource packs use emissive entities to improve atmosphere without changing Minecraft’s mechanics.
Emissive Block Entities
Block entities can also use emissive overlays. These objects store additional data and often benefit from glowing highlights.
Supported examples include:
- Chests
- Beds
- Shulker boxes
- Signs
- Other compatible block entities
Small glowing details often produce the best visual effect. They improve visibility without overpowering the original texture.
Emissive Player Skins
OptiFine also supports emissive player skins. Creators can add glowing eyes, armor details, symbols, or clothing accents using emissive overlays. These effects only change the appearance of the skin. They do not create light or provide gameplay advantages. Consistent colors and subtle highlights usually produce the most polished results.
Emissive Armor Trims
Armor trims support emissive overlays through a dedicated naming system. Each trim material uses a specific material suffix when creating the emissive texture.
For example:
- coast_amethyst_e.png
- host_iron_darker_e.png
OptiFine supports emissive armor trims for these material variants:
- amethyst
- copper
- diamond
- diamond_darker
- emerald
- gold
- gold_darker
- iron
- iron_darker
- lapis
- netherite
- netherite_darker
- quartz
- redstone
The next section explains emissive armor trims in detail, including supported material suffixes, naming conventions, and best practices for creating glowing trim overlays.
Armor Trim Emissive Support
OptiFine extends emissive textures to armor trims. This feature lets resource pack creators add glowing details to trimmed armor while preserving the original trim design. Each emissive armor trim uses the same overlay system as other emissive textures. The base trim provides the normal appearance. The emissive overlay adds the glowing pixels.
Supported Material Variants
OptiFine supports emissive overlays for these armor trim materials:
- amethyst
- copper
- diamond
- diamond_darker
- emerald
- gold
- gold_darker
- iron
- iron_darker
- lapis
- netherite
- netherite_darker
- quartz
- redstone
Each material has its own texture file. Create a matching emissive overlay for the material you want to modify.
Naming Convention
The emissive overlay keeps the original file name and adds the _e suffix before the .png extension.
For example:
coast_amethyst.png
coast_amethyst_e.png
Another example:
host_iron_darker.png
host_iron_darker_e.png
You can apply the same pattern to every supported material.
Additional examples include:
spire_diamond.png
spire_diamond_e.png
sentry_gold.png
sentry_gold_e.png
wild_redstone.png
wild_redstone_e.png
wayfinder_netherite.png
wayfinder_netherite_e.png
Best Practices
Follow these recommendations when creating emissive armor trims:
- Keep the base texture and emissive overlay the same size.
- Store both files in the same directory.
- Use the same file name with the _e suffix.
- Make only selected trim details glow.
- Match the glow color to the trim material for a natural look.
- Test every trim in different lighting conditions before publishing your resource pack.
Small glowing accents usually produce the best results. They improve visibility while preserving Minecraft’s original armor style. A balanced design also blends better with shaders and high-resolution resource packs.
Rendering Behavior Explained
Understanding how OptiFine renders emissive textures helps you create better resource packs and avoid common visual issues. The rendering system controls how glowing overlays appear under different lighting conditions and on different texture types.
Brightness Override
OptiFine renders emissive overlays at full brightness. This behavior is called brightness override. The glowing pixels stay bright regardless of the surrounding light level. They remain visible in dark caves, during the night, and in enclosed spaces. Only the emissive overlay receives this brightness boost. The base texture continues to react to Minecraft’s normal lighting. This combination creates a realistic glowing effect while preserving the original texture. Remember that brightness override does not create real light. Nearby blocks remain dark, and the game’s lighting engine does not change.
Render Layers
Every Minecraft texture belongs to a render layer. OptiFine places the emissive overlay in the same render layer as its base texture. This approach keeps the glowing details aligned with the original texture. It also prevents the overlay from appearing detached or floating above the surface. Because the overlay follows the base texture, animations and texture updates continue to work as expected.
Translucency
Some Minecraft textures contain translucent pixels instead of fully opaque ones. Common examples include slime blocks, tinted glass, and other semi-transparent textures. OptiFine preserves this translucency when it renders the emissive overlay. The glowing effect blends smoothly with the texture instead of covering it completely. This behavior produces softer and more natural lighting effects.
Transparency Scaling
Transparency directly affects emissive brightness. Fully opaque pixels produce the strongest glow. Semi-transparent pixels appear less bright because OptiFine scales their brightness according to their transparency level. This scaling creates smooth transitions between glowing and non-glowing areas. It also prevents harsh edges around translucent textures. When creating emissive overlays, use transparency carefully. Small adjustments often improve the final appearance.
SOLID vs CUTOUT_MIPPED
Minecraft uses different render layers for different texture types.
Most opaque blocks use the SOLID render layer. However, OptiFine renders emissive overlays for SOLID textures as CUTOUT_MIPPED. This special handling helps display glowing pixels correctly while preserving texture quality. It also improves rendering for textures with sharp edges and transparent sections. Resource pack creators do not need to configure this behavior manually. OptiFine manages the render layer automatically when it loads the emissive overlay.
Limitations of OptiFine Emissive Textures
OptiFine supports emissive textures for many Minecraft Optifine objects. However, some game elements do not support emissive overlays. These objects use special rendering systems that differ from standard texture rendering. Knowing these limitations helps you avoid wasted time when creating or troubleshooting a resource pack.
End Crystal
OptiFine cannot apply emissive overlays to End Crystals. End Crystals use a custom renderer instead of a standard texture. Because of this, the emissive texture system cannot attach an overlay to the model.
Ender Dragon
The Ender Dragon does not support emissive textures. Its rendering system uses custom model and animation logic. OptiFine cannot apply emissive overlays to this renderer.
Paintings
Paintings also fall outside the emissive system. Minecraft renders paintings differently from normal blocks and entities. As a result, OptiFine cannot load emissive overlays for painting textures.
Clouds
OptiFine does not support emissive overlays for clouds. Clouds belong to Minecraft’s environmental rendering system. They do not use standard resource pack textures that support emissive overlays.
Rain
Rain cannot use emissive textures. Weather effects use particle-based rendering instead of regular texture rendering. The emissive system cannot modify these effects.
Snowflakes
The same limitation applies to snowflakes. Snow particles use Minecraft’s weather renderer. They do not support emissive overlays.
Particles
Minecraft particles, such as smoke, explosions, sparks, and potion effects, do not support emissive textures. Particles use a dedicated particle engine. This engine renders them independently from the texture overlay system.
Tridents
OptiFine does not support emissive overlays for tridents. The trident uses a specialized renderer while flying and during certain animations. This renderer does not support emissive texture overlays.
End Sky
The End Sky also remains unsupported. Minecraft renders the End dimension’s sky through a custom sky renderer rather than a standard texture. Because of this design, emissive overlays cannot affect it.
Why These Limitations Exist
OptiFine’s emissive texture system works with standard texture rendering. Many unsupported objects use custom renderers, particle systems, or environmental rendering pipelines instead. Since these systems bypass the normal texture workflow, OptiFine cannot attach emissive overlays to them. This limitation comes from how Minecraft renders these objects, not from an incorrect resource pack setup. When creating a resource pack, focus your emissive effects on supported targets such as blocks, items, entities, block entities, player skins, and armor trims. This approach ensures consistent results and saves development time.
Common Problems and Fixes
Even a small mistake can stop emissive textures from working. Most issues come from incorrect file names, folder placement, or configuration. Use the checks below to find and fix the problem quickly.
Emissive Texture Is Not Glowing
If your texture does not glow, start with the basics.
Check that:
- OptiFine is installed correctly.
- Emissive Textures is enabled in Video Settings → Quality.
- The resource pack is active.
- The emissive overlay exists.
- The overlay uses the correct suffix.
Reload the resource pack with F3 + T after making changes.
Wrong File Name
OptiFine matches textures by their file names. A spelling mistake prevents the overlay from loading.
Correct example:
diamond_ore.png
diamond_ore_e.png
Incorrect examples:
diamondore_e.png
diamond_ore_glow.png
diamond_oreE.png
Keep the base name exactly the same. Add only the suffix defined in emissive.properties.
Missing emissive.properties
OptiFine needs the emissive.properties file to identify emissive overlays.
Place it here:
assets/
└── minecraft/
└── optifine/
└── emissive.properties
A basic configuration looks like this:
suffix.emissive=_e
If this file is missing, OptiFine ignores every emissive overlay.
Wrong Folder
Store the emissive overlay beside its matching base texture.
Correct example:
textures/
└── block/
├── stone.png
└── stone_e.png
Do not move the overlay into another folder. OptiFine searches the same directory as the base texture.
Resource Pack Priority
Minecraft loads resource packs from top to bottom If another resource pack replaces the same texture, your emissive overlay may never load. Open Options → Resource Packs and move your emissive resource pack above packs that modify the same files.
Version Compatibility
Always match these versions:
- Minecraft version
- OptiFine version
- Resource pack version
A resource pack made for a newer or older version may use different texture paths or file names. This mismatch can break emissive textures.
Shader Issues
Some shader packs handle emissive materials differently.
If the glow looks incorrect:
- Test without shaders.
- Update the shader pack.
- Check the shader settings for emissive material options.
- Verify that your shader supports OptiFine’s emissive texture system.
Testing without shaders helps identify whether the issue comes from the shader or the resource pack.
Z-Fighting
Z-fighting appears as flickering or overlapping textures. This issue often occurs when the base texture and emissive overlay do not align correctly.
To prevent it:
- Keep both textures the same size.
- Avoid editing only one file after changing the resolution.
- Use the original texture as the starting point for the overlay.
Matching dimensions keep both textures aligned during rendering.
Incorrect Texture Size
The emissive overlay must match the base texture exactly.
For example:
- 32×32 → 32×32 ✔
- 64×64 → 64×64 ✔
- 16×16 → 32×32 ✘
Different dimensions can cause rendering errors, missing overlays, or visual artifacts. Before testing your resource pack, compare the width and height of every texture pair.
Quick Troubleshooting Checklist
If emissive textures still do not work, verify these points:
- ✓ OptiFine matches your Minecraft version.
- ✓ Emissive Textures is enabled.
- ✓ emissive.properties exists.
- ✓ suffix.emissive matches your file names.
- ✓ Base texture and overlay share the same name.
- ✓ Both files use identical dimensions.
- ✓ Both files sit in the same folder.
- ✓ The resource pack loads above conflicting packs.
- ✓ Shaders are not blocking emissive rendering.
Checking these items solves most emissive texture problems without advanced debugging.
Best Practices for Creating Emissive Textures
Following a few proven practices helps your emissive textures look better and work correctly across different Minecraft versions. These habits also make your resource pack easier to maintain and update.
Use a Consistent Suffix
Choose one emissive suffix and use it throughout your resource pack.
The default suffix is:
suffix.emissive=_e
Keep every emissive overlay consistent with this setting.
For example:
torch.png
torch_e.png
diamond_ore.png
diamond_ore_e.png
If you change the suffix in emissive.properties, update every emissive texture to match. Mixing suffixes can prevent OptiFine from finding the correct overlay.
Keep Texture Sizes Identical
Every emissive overlay must match the size of its base texture.
Examples:
- 16×16 → 16×16
- 32×32 → 32×32
- 64×64 → 64×64
Different dimensions can cause rendering errors, missing overlays, or visual artifacts such as Z-fighting.
Use Transparent Overlays
Only the glowing parts should appear in the emissive overlay. Remove every pixel that does not need to glow. Leave those areas transparent instead.
This approach offers several benefits:
- Creates cleaner glowing effects.
- Preserves the original texture.
- Prevents unnecessary brightness.
- Improves visual balance.
Small glowing details usually look more realistic than fully glowing textures.
Optimize PNG Files
Save every texture as a PNG file. Keep file sizes as small as possible without reducing image quality. Optimized PNG files load faster and keep your resource pack organized. Avoid unnecessary metadata or duplicate texture files.
Keep Folders Organized
Store every emissive overlay beside its matching base texture. A clear folder structure makes updates and troubleshooting much easier.
For example:
textures/
└── block/
├── redstone_ore.png
└── redstone_ore_e.png
Use logical folder names and avoid moving overlays into unrelated directories.
Test After Every Change
Test your resource pack after each edit instead of waiting until the project is complete. Reload the resource pack with F3 + T and check the texture in different situations.
Test it:
- During the day.
- At night.
- Inside caves.
- With and without shaders.
- At different resource pack resolutions.
Finding problems early saves time and prevents larger issues later.
Final Tips
Before publishing your resource pack, review this checklist:
- ✓ Use one emissive suffix throughout the pack.
- ✓ Match every overlay to its base texture size.
- ✓ Keep unused areas transparent.
- ✓ Save textures as optimized PNG files.
- ✓ Organize folders carefully.
- ✓ Test after every update.
These simple practices improve compatibility, reduce errors, and help your emissive textures look polished on every supported OptiFine installation.
OptiFine vs Other Emissive Systems
Several projects support emissive textures in Minecraft. Each one serves a different purpose and works with specific game editions or mod loaders. Choosing the right solution depends on your Minecraft version and mod setup.
OptiFine
OptiFine offers built-in support for emissive textures in Minecraft Java Edition. It uses the emissive.properties file and the _e naming convention to detect glowing overlays.
It supports emissive effects for:
- Blocks
- Items
- Entities
- Player skins
- Block entities
- Armor trims
OptiFine works as a standalone optimization mod and remains the reference implementation for emissive resource packs.
Entity Texture Features (ETF)
Entity Texture Features (ETF) is a Fabric, Quilt, and NeoForge mod that adds OptiFine-style emissive support for entities.
ETF focuses on:
- Mobs
- Player skins
- Custom entities
It also supports many OptiFine resource pack formats. This compatibility allows creators to reuse existing emissive entity textures without rebuilding them. ETF does not replace OptiFine’s complete emissive system. It specializes in entity rendering.
Connectedness
Connectedness brings OptiFine-style emissive support to blocks and items on modern mod loaders. It works well with resource packs designed for OptiFine and complements ETF by covering different texture types. Many Fabric users combine Connectedness and Entity Texture Features to achieve functionality similar to OptiFine.
Bedrock PBR
Minecraft Bedrock Edition uses a different rendering system. Instead of emissive.properties, Bedrock relies on Physically Based Rendering (PBR). It defines emissive materials through Texture Set JSON files and texture maps such as MER and MERS. This system belongs to Bedrock’s rendering pipeline and is not compatible with OptiFine resource packs.
Comparison
| Feature | OptiFine | Entity Texture Features | Connectedness | Bedrock PBR |
| Minecraft Edition | Java Edition | Java Edition | Java Edition | Bedrock Edition |
| Primary Purpose | Complete emissive texture system | Emissive entities | Emissive blocks and items | Physically Based Rendering |
| Compatibility | Standalone OptiFine | Fabric, Quilt, NeoForge | Fabric, Quilt, NeoForge | Bedrock with PBR support |
| Installation | Install OptiFine | Install ETF mod | Install Connectedness mod | Use a Bedrock PBR resource pack |
| Performance | Lightweight with OptiFine optimizations | Low overhead | Low overhead | Depends on the device and graphics settings |
| Supported Objects | Blocks, items, entities, player skins, block entities, armor trims | Entities and player skins | Blocks and items | Materials defined through Texture Sets, MER, and MERS maps |
| Configuration | emissive.properties and _e suffix | Compatible with many OptiFine entity formats | Compatible with many OptiFine block and item formats | JSON Texture Sets with MER or MERS maps |
Which System Should You Choose?
Choose OptiFine if you play Minecraft Java Edition and want complete emissive texture support with minimal setup. Choose Entity Texture Features if you need emissive entities on Fabric, Quilt, or NeoForge. Choose Connectedness if you want OptiFine-style emissive blocks and items without installing OptiFine. Choose Bedrock PBR only for Minecraft Bedrock Edition. It uses a completely different rendering system and cannot load OptiFine emissive resource packs.
Minecraft Java vs Bedrock Emissive Textures
Minecraft Java Edition and Bedrock Edition both support glowing textures, but they use different rendering systems. Understanding these differences helps you choose the correct workflow for your game and resource pack.
Minecraft Java Edition
Java Edition uses OptiFine to add emissive texture support. OptiFine creates glowing effects by combining a base texture with an emissive overlay.
The system relies on:
- emissive.properties
- suffix.emissive
- The _e file naming convention
- Standard PNG textures
- Resource packs
A resource pack contains both the normal texture and its emissive overlay. OptiFine reads the configuration file and renders the overlay at full brightness. This approach is simple, flexible, and widely used by resource pack creators. It also supports blocks, items, entities, player skins, block entities, and armor trims.
Minecraft Bedrock Edition
Bedrock Edition uses Physically Based Rendering (PBR) instead of OptiFine’s overlay system. PBR treats materials as physical surfaces with different properties. It supports emissive effects alongside metallic and roughness information. Instead of using emissive.properties, Bedrock stores material settings in Texture Set JSON files.
Texture Set
A Texture Set connects the textures and material properties for a block or item. It tells the rendering engine which images contain color, normal, metallic, roughness, and emissive information. This system replaces OptiFine’s file-based configuration.
MER Map
A MER map stores three material properties inside one texture.
Each color channel has a specific purpose:
- Metallic
- Emissive
- Roughness
This design reduces the number of texture files while providing advanced lighting effects.
MERS Map
A MERS map extends the MER format. It adds an alpha channel for Subsurface Scattering. This feature improves the appearance of materials such as leaves, skin, wax, and other semi-translucent surfaces.
Alpha Channel
The alpha channel stores additional material data in Bedrock’s rendering system. Depending on the material, it can define transparency or support advanced PBR effects, including subsurface scattering in MERS textures.
Vibrant Visuals
Vibrant Visuals is Bedrock Edition’s modern graphics pipeline. It uses PBR materials, Texture Sets, and advanced lighting features to deliver more realistic visuals across supported devices. Unlike OptiFine, this system belongs to Minecraft Bedrock Edition and works directly with the game’s rendering engine.
Java vs Bedrock Comparison
| Feature | Minecraft Java Edition | Minecraft Bedrock Edition |
| Rendering System | OptiFine emissive overlays | Physically Based Rendering (PBR) |
| Configuration | emissive.properties | Texture Set JSON files |
| Texture Format | PNG textures with _e overlays | PBR textures with MER or MERS maps |
| Emissive Method | Overlay rendering | Material-based emissive channel |
| Naming System | suffix.emissive and _e suffix | Texture Set definitions |
| Material Data | Separate emissive overlay | Metallic, Emissive, Roughness, and optional Subsurface Scattering |
| Supported Workflow | Resource packs with OptiFine | PBR resource packs |
| Graphics Pipeline | OptiFine rendering | Vibrant Visuals |
| Compatibility | Minecraft Java Edition | Minecraft Bedrock Edition |
Which One Should You Use?
Choose OptiFine if you play Minecraft Java Edition. It offers a simple and proven way to create emissive textures with standard resource packs. Choose Bedrock PBR if you play Minecraft Bedrock Edition. Its material-based workflow provides advanced visual effects, but it requires Texture Sets, MER or MERS maps, and the Bedrock rendering pipeline. Although both systems create glowing textures, they are not compatible with each other. A resource pack built for OptiFine will not work on Bedrock, and a Bedrock PBR pack cannot load in Java Edition without conversion.
Performance Impact of Emissive Textures
Many players wonder whether emissive textures affect Minecraft performance. In most cases, the impact is small. However, performance depends on your hardware, resource pack resolution, shader settings, and the number of emissive textures loaded at once.
FPS
Emissive textures have little effect on frames per second (FPS) when used without shaders. OptiFine only renders an additional overlay for supported textures. Modern computers can usually handle this extra step with little or no noticeable FPS loss. Large resource packs with many animated emissive textures may reduce FPS on older hardware.
VRAM
Emissive overlays require additional video memory (VRAM) because Minecraft loads both the base texture and its emissive overlay. A few emissive textures use very little VRAM. However, hundreds of high-resolution overlays can increase memory usage.
Systems with limited VRAM may experience:
- Longer loading times.
- Lower frame rates.
- Texture loading delays.
Resource Pack Size
Every emissive overlay adds another PNG file to your resource pack. A small pack with a few glowing textures grows only slightly. A large pack with thousands of emissive overlays can increase the overall download size. Removing unused textures and optimizing PNG files helps keep the pack lightweight.
High-Resolution Textures
Higher resolutions require more system resources.
For example:
- 16×16 textures have the lowest memory usage.
- 32×32 and 64×64 textures need more VRAM.
- 128×128 and higher resolutions require significantly more graphics memory.
Choose a texture resolution that matches your computer’s capabilities. Higher detail looks better but increases resource usage.
Shader Interaction
Shaders have the greatest impact on emissive texture performance. A shader pack performs additional lighting calculations while rendering emissive materials. As a result, GPU usage usually increases.
Performance depends on several factors:
- Your graphics card.
- Shader quality settings.
- Resource pack resolution.
- Number of emissive textures visible on screen.
If you notice lower FPS, try these steps:
- Lower the shader quality.
- Reduce the resource pack resolution.
- Decrease render distance.
- Test the resource pack without shaders.
These changes help identify whether the shader or the resource pack causes the slowdown.
Does OptiFine Emissive Textures Reduce Performance?
For most players, the performance impact remains minimal. OptiFine’s emissive overlay system is lightweight and efficient. The largest performance drops usually come from high-resolution resource packs or demanding shader packs, not from emissive textures alone. Using optimized PNG files, reasonable texture resolutions, and compatible shaders helps you enjoy glowing textures without sacrificing smooth gameplay.
Best Resource Packs Using Emissive Textures
Emissive textures can improve almost any resource pack. Some packs stay close to Minecraft’s original style, while others create fantasy worlds or realistic environments. The best choice depends on your preferred gameplay and your computer’s hardware.
Vanilla+
Best for: Players who want the default Minecraft look with subtle improvements. Vanilla+ packs keep Mojang’s original art style while adding small glowing details. Ores, redstone, lanterns, and enchanted items become easier to spot without changing the game’s identity. A good example is Emissive Vanilla Textures. It adds emissive effects to blocks, items, mobs, and armor details while preserving the vanilla appearance. It requires OptiFine or compatible alternatives for full functionality.
Choose a Vanilla+ pack if you want:
- Better visibility in dark areas.
- Familiar Minecraft textures.
- Minimal performance impact.
- A lightweight resource pack.
Fantasy
Best for: Adventure maps, RPG servers, and magical builds. Fantasy resource packs use emissive textures to create glowing crystals, enchanted weapons, magical runes, mystical plants, and illuminated structures. The glow adds atmosphere without changing gameplay. Small glowing accents also make fantasy builds feel more immersive.
Look for fantasy packs that:
- Use emissive effects sparingly.
- Keep colors consistent.
- Support shaders for richer lighting.
PvP
Best for: Competitive players who value visibility and performance. PvP packs use emissive textures for practical reasons rather than decoration. Many highlight ores, simplify tools, and improve visibility during combat. A good example is Vanilla PvP Edits. It combines emissive ores with shorter weapons, low-fire textures, and cleaner visual effects to improve gameplay clarity.
Choose a PvP pack if you want:
- Better ore visibility.
- Cleaner combat visuals.
- High FPS.
- Minimal distractions.
Realistic
Best for: Players who want lifelike graphics. Realistic packs combine emissive textures with PBR materials, detailed normal maps, and shaders. Lanterns, lava, ores, and glowing blocks appear much more natural. One popular example is Optimum Realism. It includes hundreds of PBR materials, emissive textures, and support for Java shaders as well as Bedrock RTX editions.
Realistic packs work best on computers with:
- A dedicated graphics card.
- Plenty of VRAM.
- Modern shader support.
RTX-Compatible
Best for: Minecraft Bedrock Edition players with NVIDIA RTX graphics cards. RTX-compatible packs use Bedrock’s Physically Based Rendering (PBR) system instead of OptiFine’s emissive overlays.
These packs combine:
- MER or MERS maps.
- Texture Sets.
- Ray tracing.
- Native emissive materials.
The result includes realistic reflections, dynamic lighting, and high-quality glowing surfaces. Optimum Realism also provides a dedicated Bedrock RTX version for supported hardware.
Which Resource Pack Should You Choose?
| Category | Best For | Main Benefit |
| Vanilla+ | Everyday survival | Preserves Minecraft’s original style with subtle emissive details |
| Fantasy | RPG worlds and adventure maps | Creates magical lighting and immersive environments |
| PvP | Competitive gameplay | Improves visibility while maintaining high performance |
| Realistic | High-end gaming PCs | Delivers lifelike materials, detailed emissive effects, and immersive visuals |
| RTX-Compatible | Bedrock Edition with RTX GPUs | Uses native PBR and ray tracing for advanced lighting |
The best resource pack is not always the most detailed one. Choose a pack that matches your play style, Minecraft edition, and hardware. A balanced pack often provides the best experience because it combines attractive emissive effects with smooth performance.
Frequently Asked Questions
What are Minecraft OptiFine emissive textures?
Minecraft OptiFine emissive textures are glowing texture overlays that remain bright in any light level. They use a base texture and a matching emissive overlay to create the glowing effect.
Do emissive textures produce real light?
No. Emissive textures only make selected pixels appear bright. They do not light nearby blocks, reduce mob spawning, or replace light sources like torches and lanterns.
Do I need OptiFine?
Yes, if you want to use OptiFine’s native emissive texture system in Minecraft Java Edition. If you play with Fabric, Quilt, or NeoForge, you can achieve similar functionality by using compatible mods such as Entity Texture Features (ETF) and Connectedness.
Can Fabric use emissive textures?
Yes. Fabric supports OptiFine-style emissive textures through compatible mods.
A common setup combines:
- Entity Texture Features (ETF) for entities and player skins.
- Connectedness for blocks and items.
This combination supports many OptiFine resource packs.
Can Forge use emissive textures?
Yes. You can use OptiFine with compatible Forge versions. Modern mod loaders such as NeoForge also support compatible emissive texture mods like Entity Texture Features. Always verify that your Minecraft version, mod loader, and resource pack are compatible.
What does emissive.properties do?
emissive.properties is the configuration file for OptiFine’s emissive texture system. It tells OptiFine how to identify emissive overlays by reading settings such as:
suffix.emissive=_e
Without this file, OptiFine cannot detect emissive textures.
What does suffix.emissive=_e mean?
This setting tells OptiFine to search for texture files ending with the _e suffix.
For example:
stone.png
stone_e.png
The first file is the base texture. The second file is the emissive overlay.
Why aren’t my textures glowing?
Several issues can prevent emissive textures from working.
Check that:
- Emissive Textures is enabled in OptiFine.
- emissive.properties exists.
- The file names use the correct suffix.
- The overlay matches the base texture size.
- Both files are in the same folder.
- Your resource pack has the highest priority.
- Your Minecraft and OptiFine versions match.
Can mobs have emissive textures?
Yes. OptiFine supports emissive overlays for many entities and mobs.
Popular examples include:
- Spiders
- Endermen
- Wardens
- Custom mobs
The glowing effect only changes their appearance. It does not affect gameplay.
Can armor trims glow?
Yes. OptiFine supports emissive armor trims. Each trim material uses a matching texture with the _e suffix.
For example:
coast_amethyst.png
coast_amethyst_e.png
Supported materials include amethyst, diamond, emerald, gold, iron, lapis, quartz, redstone, netherite, and several darker variants.
Do emissive textures reduce FPS?
Usually, no. The emissive overlay system has a small performance impact on most computers. High-resolution resource packs and shader packs have a much greater effect on FPS.
Do shaders support emissive textures?
Many shader packs support OptiFine emissive textures. However, support varies between shader packs. If emissive textures do not appear correctly, test the resource pack without shaders first. Then review your shader settings or update the shader pack.
Can Bedrock Edition use emissive textures?
Yes, but Bedrock Edition uses a different system. Instead of OptiFine, Bedrock relies on Physically Based Rendering (PBR) with Texture Sets, MER maps, and MERS maps. OptiFine resource packs do not work directly in Bedrock Edition.
What’s the difference between MER and MERS maps?
Both formats belong to Minecraft Bedrock’s PBR system.
A MER map stores three material properties:
- Metallic
- Emissive
- Roughness
A MERS map stores the same three properties and adds an alpha channel for Subsurface Scattering. This extra channel improves the appearance of materials such as leaves, skin, and wax by allowing light to scatter beneath the surface.
Conclusion
Minecraft OptiFine emissive textures add glowing details to blocks, items, entities, player skins, block entities, and armor trims. They use a separate overlay that remains bright regardless of the surrounding light level. However, emissive textures do not create actual light in the Minecraft world. Getting started is straightforward. Install the correct OptiFine version, enable Emissive Textures in the video settings, and use a compatible resource pack. To create your own pack, make a matching emissive overlay and save it with the correct _e suffix. You can also configure emissive.properties inside the assets/minecraft/optifine/ folder when required.
Most emissive texture issues result from simple setup errors. Incorrect file names, missing emissive.properties, wrong folder locations, mismatched texture sizes, and resource pack conflicts can prevent the glow from appearing. Checking these details first can resolve most problems. Compatibility also depends on your Minecraft setup. OptiFine provides a native emissive texture system for Minecraft Java Edition. Players using Fabric, Quilt, or NeoForge can use compatible alternatives such as Entity Texture Features (ETF) and other supporting mods. Minecraft Bedrock Edition uses a different system based on Physically Based Rendering (PBR), Texture Sets, and MER or MERS maps.
If you create your own resource packs, keep the files organized and use consistent naming. Match texture dimensions, use transparent overlays, optimize PNG files, and test each change before releasing the pack. Subtle glowing accents often look more natural than completely illuminated textures. With the right setup, Minecraft OptiFine emissive textures can turn ordinary resource packs into more immersive visual experiences. They add striking glowing details while maintaining smooth performance and the familiar Minecraft gameplay style.