
Minecraft OptiFine Shaders (Download, Install and Best Shader Packs)
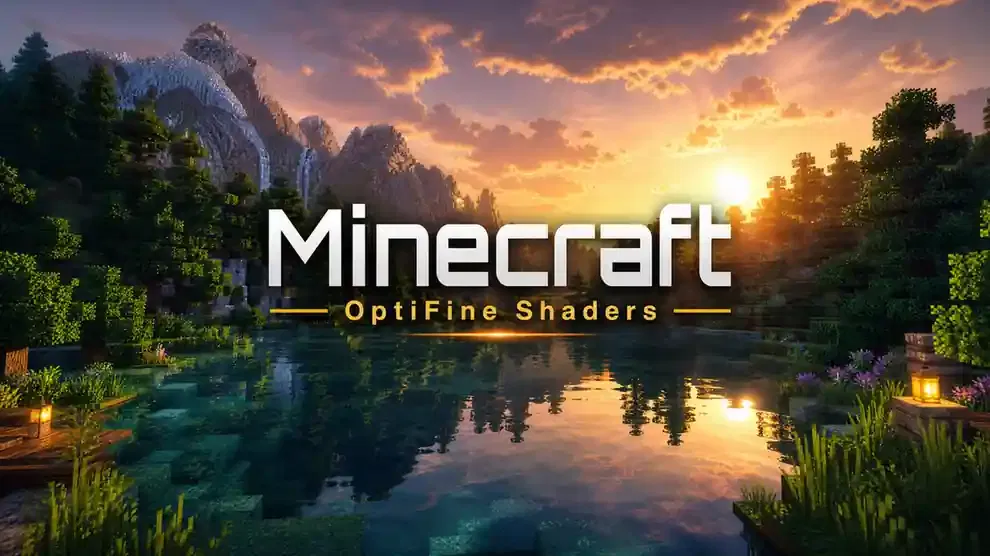
Minecraft OptiFine shaders transform Minecraft Java Edition with realistic lighting, detailed shadows, better water, and immersive visual effects. OptiFine acts as the graphics enhancement mod that lets Minecraft load compatible shader packs.
Millions of players choose OptiFine shaders to make every world feel more alive. Sunlight shines through trees. Water reflects the environment. Dynamic shadows and smooth lighting create a richer experience without changing the game’s core gameplay.
OptiFine and shader packs work together, but they serve different purposes. OptiFine enables shader support and improves performance. A shader pack adds the visual effects, textures, and lighting enhancements that you see in the game.
Modern shader packs introduce features like dynamic shadows, volumetric fog, atmospheric scattering, reflections, refraction, ambient occlusion, and realistic sky colors. Many also support PBR materials, tone mapping, and color grading for even better visuals.
Advanced graphics require more hardware power. Your frame rate depends on your GPU, CPU, shader settings, and render distance. Choosing the right shader pack helps you balance image quality and performance.
Minecraft OptiFine shaders support many Minecraft Java Edition versions, including the latest releases and several older versions. Compatibility depends on both your OptiFine version and the shader pack you install.
This guide explains everything you need to know. You’ll learn how OptiFine shaders work, how to install them safely, which shader packs perform best, how to increase FPS, and how to solve common problems. By the end, you’ll know how to build the best visual experience for your Minecraft world.
Minecraft OptiFine Shaders at a Glance
The table below highlights the key facts about Minecraft OptiFine shaders. It helps you understand compatibility, installation, and core features before getting started.
| Feature | Details |
| Works With | Minecraft Java Edition |
| Loader | OptiFine |
| File Type | ZIP Shader Pack |
| Installation Time | About 2 Minutes |
| Performance | Low to High (Depends on Hardware & Settings) |
| Supports | Dynamic Lighting, Shadows, Reflections, Water Effects, Ambient Occlusion, Volumetric Fog, PBR, Tone Mapping |
| Compatible With | Windows, macOS, Linux |
| Graphics API | OpenGL |
| Recommended Java | Latest Java Version Compatible with Your Minecraft Version |
| Storage Required | Usually 5–50 MB per Shader Pack |
| Best For | Better Graphics, Realistic Lighting, and Enhanced Visual Effects |
What Are Minecraft OptiFine Shaders?
Minecraft OptiFine shaders are visual enhancement packs that make Minecraft look more realistic. They improve lighting, shadows, water, skies, and many other graphics effects. Instead of changing gameplay, shaders upgrade how the game world looks and feels.
OptiFine makes these improvements possible by adding built-in shader support to Minecraft Java Edition. Without OptiFine, the game cannot load most traditional shader packs.
How OptiFine Makes Shaders Possible
OptiFine adds a rendering pipeline that allows Minecraft to process advanced graphics effects. This pipeline sends game data through specialized shader programs before displaying each frame.
Many modern shader packs use a deferred rendering approach. It stores scene information first and applies lighting later. This method creates realistic shadows, reflections, and atmospheric effects while keeping graphics organized.
OptiFine also improves graphics quality with advanced rendering options. It supports features like dynamic shadows, ambient occlusion, smooth lighting, anti-aliasing, anisotropic filtering, mipmaps, and configurable render distance. These settings help players balance image quality and performance.
When you enable shaders, OptiFine loads the required shader files during game startup. It reads the shader instructions and applies visual effects to every frame in real time.
How Shader Packs Work
A shader pack is a compressed ZIP file that contains everything needed to create custom graphics. You should keep the ZIP file intact and place it inside the shaderpacks folder.
Inside the shader pack, shader programs control different parts of the rendering process. Vertex shaders calculate object positions. Fragment shaders determine the final color of every pixel. Other programs create shadows, reflections, water effects, and post-processing.
Configuration files, such as shaders.properties, define global settings and user options. They also control how different shader features work together across Minecraft worlds.
The rendering process happens in stages. First, OptiFine collects scene data into intermediate buffers. Next, shader programs apply lighting, shadows, reflections, and atmospheric effects. Finally, post-processing adds details like tone mapping, color grading, bloom, and fog before the finished image appears on your screen.
Understanding these basics makes it easier to choose the right shader pack, adjust settings, and troubleshoot issues later in this guide.
How OptiFine Shaders Work
OptiFine shaders create every frame through a series of rendering stages. Each stage handles a specific graphics task. Together, they produce realistic lighting, shadows, reflections, and other visual effects.
Rendering Pipeline
The rendering pipeline is the step-by-step process that turns Minecraft’s game world into the final image on your screen. OptiFine sends world data through several shader programs before displaying each frame. Every program performs a unique job.
Vertex Shader
The vertex shader processes every 3D object in the scene. It calculates the position, size, and movement of blocks, entities, and terrain. This stage builds the foundation for all later visual effects.
Fragment Shader
The fragment shader colors every visible pixel. It applies lighting, shadows, textures, reflections, fog, and other surface effects. Most of the visual quality comes from this stage.
GBuffer Programs
GBuffer programs collect important scene data before lighting begins. They store details like colors, normals, depth, and material information in separate buffers. This data helps shader packs create accurate lighting and realistic reflections.
Composite Programs
Composite programs combine data from earlier stages into one final image. They also apply post-processing effects like bloom, tone mapping, color grading, motion blur, and depth of field when supported by the shader pack.
Shadow Programs
Shadow programs generate dynamic shadow maps from the sun and moon. They calculate how light interacts with blocks and entities. This process creates realistic moving shadows throughout the world.
Color Attachments
Color attachments act as temporary storage during rendering. They keep information like color, depth, and normal data between pipeline stages. Shader programs read this data to build advanced visual effects efficiently.
Uniform Variables
Uniform variables provide live game information to shader programs. They include the world time, camera position, weather, player location, and lighting conditions. Shaders use this data to update effects in real time.
Texture Bindings
Texture bindings connect shader programs with Minecraft textures. They load blocks, items, lightmaps, normal maps, and other resources into the rendering pipeline. This connection helps shaders create detailed materials, realistic water, and high-quality lighting.
Every stage works together to improve Minecraft’s graphics. Understanding this pipeline also makes it easier to configure shader settings and troubleshoot visual issues later in this guide.
Features of Minecraft OptiFine Shaders
Minecraft OptiFine shaders improve almost every part of the game’s graphics. They add realistic lighting, detailed textures, and immersive environmental effects. Together, these features create a richer Minecraft experience.
Dynamic Shadows
Dynamic shadows move naturally as the sun and moon change position. They add depth and make every environment feel more realistic.
Directional Lighting
Directional lighting changes how light falls across the world. It creates brighter highlights and smoother transitions between light and dark areas.
Ambient Occlusion
Ambient occlusion darkens corners and tight spaces. This effect makes blocks appear more detailed and natural.
Sun and Moon Lighting
Shaders adjust sunlight and moonlight throughout the day. Morning, sunset, and nighttime each have their own unique atmosphere.
Volumetric Fog
Volumetric fog adds realistic depth to the environment. Mountains, forests, and valleys look more immersive in different weather conditions.
Atmospheric Scattering
Atmospheric scattering changes how light travels through the sky. It creates smoother sunrise, sunset, and daytime colors.
Sun Rays
Sun rays appear when light passes through trees, caves, or windows. These beams add cinematic lighting effects.
Sky Colors
Shaders produce vibrant sky gradients that change with time and weather. The sky looks more natural during every season and biome.
Horizon Effects
Horizon effects create smoother transitions between the land and the sky. Distant landscapes appear more realistic.
Water Reflections
Water reflects nearby blocks, trees, mountains, and the sky. Lakes and oceans become much more lifelike.
Refraction
Refraction bends light as it passes through water. Objects beneath the surface appear more realistic.
Water Waves
Animated water waves create natural movement across rivers, lakes, and oceans. The effect makes water feel alive.
Water Caustics
Water caustics project moving light patterns onto nearby surfaces. These patterns improve underwater visuals.
Anti-Aliasing
Anti-aliasing smooths rough edges on blocks and objects. The world looks cleaner with fewer jagged lines.
Mipmaps
Mipmaps improve texture quality at long distances. They also reduce shimmering while you move.
Anisotropic Filtering
Anisotropic filtering keeps distant textures sharp. Roads, paths, and buildings remain clear from different viewing angles.
Smooth Lighting
Smooth lighting softens harsh light transitions between blocks. Indoor and outdoor areas appear more natural.
Render Distance
Shaders work with OptiFine’s render distance settings to display more terrain while maintaining visual quality.
Tone Mapping
Tone mapping balances brightness and contrast across the scene. Bright sunlight and dark caves look more comfortable to view.
Color Grading
Color grading adjusts the overall color style of the game. Each shader pack creates its own visual atmosphere.
PBR Materials
Physically Based Rendering (PBR) adds realistic surface properties. Materials like stone, wood, and metal respond naturally to light.
Deferred Lighting
Deferred lighting calculates illumination after scene data is collected. This method supports advanced shadows, reflections, and other modern effects.
Normal Maps
Normal maps create the illusion of detailed surfaces without adding extra geometry. Blocks appear deeper and more textured.
Height Maps
Height maps improve surface depth by simulating small bumps and grooves. They make textures look more realistic from different angles.
These features work together to transform Minecraft into a more immersive world. The exact effects depend on the shader pack you choose and your hardware capabilities.
Best Minecraft OptiFine Shader Packs
Choosing the right shader pack depends on your PC and visual preferences. Some packs focus on realistic lighting, while others deliver better performance. The shader packs below rank among the most trusted choices in the Minecraft community.
Complementary Shaders
Complementary Shaders offer an excellent balance between graphics and performance. They work well on many systems and support frequent updates.
Features
- Realistic dynamic lighting
- Soft shadows
- Beautiful water reflections
- Volumetric clouds and fog
- PBR material support
- Highly customizable settings
Best For
Players who want premium graphics without sacrificing too much FPS.
Performance
Runs smoothly on most mid-range and high-end PCs.
BSL Shaders
BSL Shaders deliver vibrant colors and cinematic lighting. They create realistic skies, water, and weather effects while offering many customization options.
Best For
Players who enjoy colorful environments and immersive landscapes.
SEUS Renewed
SEUS Renewed remains one of the most popular shader packs ever created. It features realistic lighting, natural shadows, and impressive reflections.
Best For
Players seeking realistic visuals and cinematic screenshots.
Sildur’s Vibrant Shaders
Sildur’s Vibrant Shaders provide multiple quality presets for different hardware. They balance performance with attractive lighting effects.
Best For
Low-end, mid-range, and high-end PCs thanks to scalable presets.
Chocapic13 Shaders
Chocapic13 Shaders focus on smooth performance and clean visuals. They include several quality levels for different graphics cards.
Best For
Players who want higher FPS while enjoying improved graphics.
Project LUMA
Project LUMA builds upon classic shader technology with modern improvements. It produces realistic lighting and detailed environmental effects.
Best For
Players who prefer natural lighting and balanced realism.
Vanilla Plus
Vanilla Plus keeps Minecraft’s original art style while adding subtle lighting improvements. It enhances visuals without changing the game’s familiar appearance.
Best For
Players who want a lightweight shader with a vanilla feel.
Minecraft OptiFine Shader Pack Comparison
| Shader Pack | Graphics | FPS | Difficulty | Best For | PBR | Reflections | Dynamic Shadows | Water Quality |
| Complementary Shaders | ★★★★★ | ★★★★☆ | Easy | Balanced Graphics | ✅ | ✅ | ✅ | Excellent |
| BSL Shaders | ★★★★★ | ★★★☆☆ | Easy | Realistic Lighting | ✅ | ✅ | ✅ | Excellent |
| SEUS Renewed | ★★★★★ | ★★☆☆☆ | Medium | Cinematic Visuals | Partial | ✅ | ✅ | Excellent |
| Sildur’s Vibrant Shaders | ★★★★☆ | ★★★★☆ | Easy | All Hardware Levels | Partial | ✅ | ✅ | Very Good |
| Chocapic13 Shaders | ★★★★☆ | ★★★★★ | Easy | Maximum FPS | Partial | Limited | ✅ | Good |
| Project LUMA | ★★★★★ | ★★★☆☆ | Medium | Natural Realism | ✅ | ✅ | ✅ | Excellent |
| Vanilla Plus | ★★★☆☆ | ★★★★★ | Very Easy | Vanilla Experience | ❌ | Limited | Limited | Good |
Every shader pack offers a unique visual style. The best choice depends on your hardware, desired graphics quality, and performance goals. In the next section, you’ll learn how to download and install your preferred shader pack safely.
How to Download Minecraft OptiFine Shaders
Downloading Minecraft OptiFine shaders takes only a few minutes. Follow these steps to install your favorite shader pack safely.
Step 1: Install OptiFine
Download and install the latest OptiFine version that matches your Minecraft Java Edition version. OptiFine adds built-in support for shader packs.
Tip: Launch OptiFine once after installation. This creates the required shaderpacks folder automatically.
Step 2: Download a Shader Pack
Choose a trusted shader pack that matches your OptiFine version. Download the shader pack as a ZIP file from its official website or a reputable source.
Do not extract the ZIP file.
Step 3: Locate the shaderpacks Folder
Open Minecraft with the OptiFine profile.
Go to:
Options → Video Settings → Shaders → Shader Packs Folder
Minecraft opens the correct folder automatically.
Step 4: Copy the ZIP File
Move or copy the downloaded shader pack ZIP file into the shaderpacks folder.
You can store multiple shader packs in this folder and switch between them anytime.
Step 5: Select Your Shader
Return to the Shaders menu.
Minecraft detects every compatible shader pack automatically.
Click the shader pack you want to use, then select Done.
Step 6: Launch Minecraft
Load or create a world.
Minecraft applies the shader pack during rendering. You should now see improved lighting, realistic shadows, reflections, water effects, and enhanced skies.
Note: The first launch may take longer than usual. Shader packs compile their files before rendering the world.
The next section explains the complete installation process in more detail, including common setup mistakes and the best practices for a smooth experience.
How to Install OptiFine Shaders
After downloading your shader pack, install it correctly to enjoy the best graphics. Follow these simple steps to complete the setup.
Step 1: Install Java
OptiFine requires Java to run its installer. Download the latest Java version that matches your operating system.
After installing Java, restart your computer if prompted.
Step 2: Install OptiFine
Open the downloaded OptiFine JAR file.
Click Install and wait for the installer to finish.
When the installation completes, a new OptiFine profile appears in the Minecraft Launcher.
Step 3: Open Minecraft
Launch the Minecraft Launcher.
Select the OptiFine profile from the version list.
Click Play to start Minecraft.
Wait until the main menu loads.
Step 4: Open Video Settings
From the main menu, click:
Options → Video Settings
You will notice additional graphics settings that OptiFine adds.
Step 5: Open the Shaders Menu
Click Shaders.
Then select Shaders Folder if you have not already added a shader pack.
The shaderpacks folder opens automatically.
Step 6: Load Your Shader Pack
Copy the downloaded ZIP shader pack into the shaderpacks folder.
Return to Minecraft.
Select the shader pack from the available list.
Click Done.
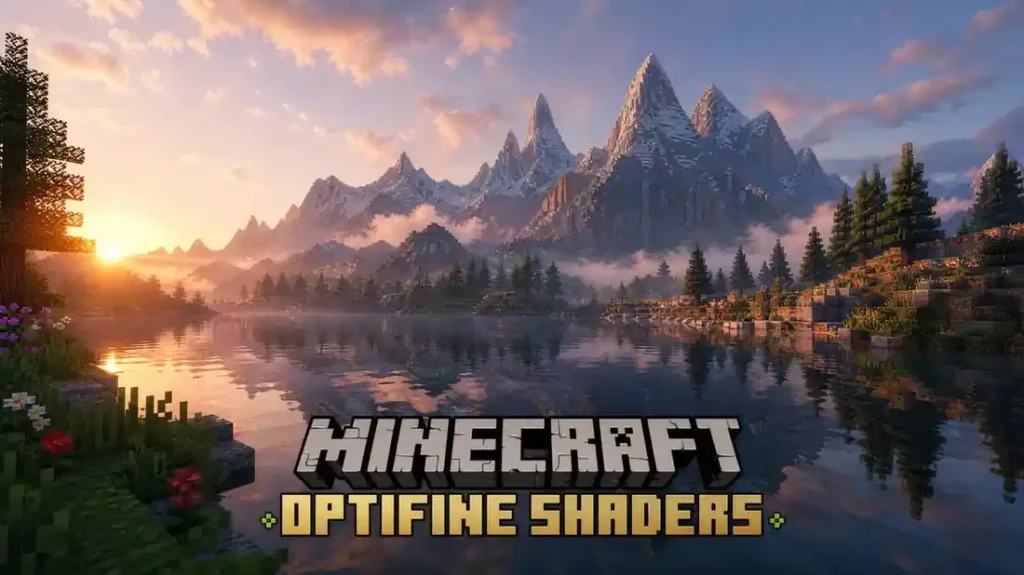
Minecraft compiles the shader files and loads the new graphics.
Step 7: Adjust Shader Settings
Open the Shaders menu again to fine-tune your experience.
Adjust settings based on your hardware.
Recommended options include:
- Shadow Quality
- Reflection Quality
- Volumetric Fog
- Anti-Aliasing
- Render Quality
- Water Effects
- PBR Materials
- Dynamic Shadows
Start with medium settings if you use a mid-range PC. Increase quality gradually while monitoring your FPS.
Installation Checklist
✔ Java installed
✔ OptiFine installed
✔ Minecraft launched with the OptiFine profile
✔ Shader pack saved as a ZIP file
✔ ZIP file placed inside the shaderpacks folder
✔ Shader pack selected in Minecraft
✔ Graphics settings adjusted for your hardware
If everything is complete, your Minecraft world will display realistic lighting, detailed shadows, improved water, and immersive visual effects. The next section explains how to optimize shader settings for better graphics and higher FPS.
Best Shader Settings
The best shader settings depend on your hardware and the shader pack you use. Start with a preset that matches your PC. Then adjust individual settings until you find the right balance between graphics and FPS.
Maximum FPS Settings
These settings prioritize smooth gameplay. They work well on entry-level and older computers.
| Setting | Recommended Value |
| Shadow Quality | Low |
| Shadow Resolution | 1024×1024 |
| Render Quality | 0.75x |
| Reflection Quality | Low |
| Water Quality | Low |
| Volumetric Fog | Off |
| Bloom | Off |
| Motion Blur | Off |
| Depth of Field | Off |
| Anti-Aliasing | Off |
| PBR Materials | Off |
| Render Distance | 8–10 Chunks |
| Smooth Lighting | Minimum |
| FPS Target | Unlimited |
Best For
- Low-end PCs
- Integrated graphics
- Maximum FPS
- Competitive gameplay
Balanced Quality Settings
These settings provide excellent visuals while maintaining stable performance. Most players should start with this preset.
| Setting | Recommended Value |
| Shadow Quality | Medium |
| Shadow Resolution | 2048×2048 |
| Render Quality | 1.0x |
| Reflection Quality | Medium |
| Water Quality | Medium |
| Volumetric Fog | Medium |
| Bloom | Low |
| Motion Blur | Off |
| Depth of Field | Off |
| Anti-Aliasing | FXAA or Low |
| PBR Materials | On (If Supported) |
| Render Distance | 12–16 Chunks |
| Smooth Lighting | Maximum |
| FPS Target | Unlimited |
Best For
- Mid-range gaming PCs
- Balanced graphics and FPS
- Survival and multiplayer worlds
Ultra Graphics Settings
These settings unlock the highest visual quality. Use them only if your hardware can handle demanding shader effects.
| Setting | Recommended Value |
| Shadow Quality | High |
| Shadow Resolution | 4096×4096 or Higher |
| Render Quality | 1.5x–2.0x |
| Reflection Quality | High |
| Water Quality | Ultra |
| Volumetric Fog | High |
| Bloom | High |
| Motion Blur | Optional |
| Depth of Field | On |
| Anti-Aliasing | TAA or High |
| PBR Materials | Enabled |
| Render Distance | 20–32 Chunks |
| Smooth Lighting | Maximum |
| FPS Target | Unlimited |
Best For
- High-end gaming PCs
- Modern dedicated GPUs
- Cinematic gameplay
- Screenshots and content creation
Quick Tips
- Increase one setting at a time.
- Test FPS after every change.
- Lower shadow quality before reducing render distance.
- Disable motion blur if you prefer a sharper image.
- Keep your graphics drivers and OptiFine version updated for the best compatibility.
The next section explains additional performance optimization techniques to help you gain more FPS without sacrificing too much visual quality.
Performance Optimization
Shader packs demand more system resources than standard Minecraft graphics. A few smart adjustments can improve FPS without ruining visual quality. Start with the easiest changes first. Then test your game after each adjustment.
FPS Improvements
Higher FPS creates smoother gameplay and reduces stuttering. Lower demanding shader effects before changing everything else.
Try these improvements:
- Use a lightweight shader pack.
- Reduce shadow quality.
- Lower reflection quality.
- Disable motion blur.
- Turn off depth of field.
- Reduce volumetric fog.
- Close background applications before playing.
These changes often provide the biggest FPS gains.
Render Quality
Render quality controls how detailed shader effects appear.
Lower values improve performance.
Higher values produce sharper lighting and reflections.
Start with 1.0x.
Reduce it to 0.75x if FPS drops.
Increase it only if your GPU has extra performance.
Chunk Loading
Chunk loading affects both FPS and world loading speed.
Large render distances force your computer to process more terrain.
Recommended values:
| Hardware | Render Distance |
| Low-End PC | 8–10 Chunks |
| Mid-Range PC | 12–16 Chunks |
| High-End PC | 20–32 Chunks |
Lower render distance first when your FPS becomes unstable.
Performance Settings
OptiFine includes several built-in options that improve performance.
Recommended settings:
| Option | Recommendation |
| Smooth FPS | On |
| Fast Render* | On (Only if supported by your shader pack) |
| Smart Animations | On |
| Dynamic Updates | On |
| Entity Shadows | Off |
| Clouds | Fast or Off |
| Particles | Decreased |
| Entity Distance | 75%–100% |
*Some shader packs disable Fast Render automatically because it conflicts with advanced rendering features.
GPU Settings
Your graphics card has the biggest impact on shader performance.
For the best results:
- Update your GPU driver regularly.
- Use the dedicated GPU on laptops.
- Enable the High Performance power plan.
- Close GPU-intensive programs before launching Minecraft.
- Keep GPU temperatures under control to prevent thermal throttling.
RAM Allocation
Minecraft needs enough memory to load shader packs smoothly.
General recommendations:
| System Memory | Allocate to Minecraft |
| 8 GB RAM | 3–4 GB |
| 16 GB RAM | 4–6 GB |
| 32 GB or More | 6–8 GB |
Avoid assigning too much RAM. Extra memory rarely improves FPS and may increase loading times.
Java Arguments
Java launch arguments can improve stability when used correctly.
A simple allocation works well for most players:
-Xms2G -Xmx4G
Use higher values only if your system has enough available memory.
Avoid copying long lists of random Java arguments from the internet. Many outdated tweaks no longer improve modern Minecraft performance.
Performance Checklist
✔ Use the latest OptiFine version.
✔ Install the latest Java version.
✔ Keep your GPU driver updated.
✔ Match your shader pack to your hardware.
✔ Lower shadow quality before reducing other effects.
✔ Test one setting at a time.
✔ Monitor FPS after every change.
Following these steps helps you enjoy smoother gameplay while keeping the visual quality that makes Minecraft OptiFine shaders so impressive.
Low-End PC Settings
You do not need an expensive gaming PC to enjoy Minecraft OptiFine shaders. The right shader pack and graphics settings can deliver smooth gameplay on entry-level hardware. Focus on stable FPS instead of maximum visual quality.
Recommended Shader Packs
These shader packs work well on low-end and older systems.
| Shader Pack | Why It’s Good |
| Sildur’s Vibrant Shaders Lite | Lightweight and easy to customize |
| Chocapic13 Low | Excellent FPS with clean visuals |
| Vanilla Plus | Keeps Minecraft’s original style with better lighting |
| Complementary Shaders (Performance Preset) | Good balance between graphics and performance |
Choose the lowest preset first. Increase quality only if your FPS stays stable.
Recommended Graphics Settings
Use these settings to reduce GPU workload.
| Setting | Recommended Value |
| Shadow Quality | Low |
| Shadow Resolution | 1024×1024 |
| Reflection Quality | Low |
| Water Quality | Low |
| Volumetric Fog | Off |
| Bloom | Off |
| Motion Blur | Off |
| Depth of Field | Off |
| Anti-Aliasing | Off |
| PBR Materials | Off |
| Smooth Lighting | Minimum |
| Clouds | Fast or Off |
| Particles | Decreased |
These settings improve performance while keeping the game visually appealing.
Render Distance
Render distance has a major impact on FPS.
Use these values for smoother gameplay.
| System Type | Recommended Distance |
| Entry-Level PC | 6–8 Chunks |
| Older Mid-Range PC | 8–10 Chunks |
| Budget Gaming PC | 10–12 Chunks |
Increase the distance only if your frame rate remains stable.
FPS Tips
Small changes can produce noticeable performance gains.
- Select the Performance or Lite shader preset.
- Lower shadow quality before reducing textures.
- Disable reflections if FPS drops.
- Turn off volumetric fog.
- Close unnecessary background programs.
- Update your graphics driver regularly.
- Keep Minecraft and OptiFine up to date.
- Use fullscreen mode for better performance on many systems.
- Monitor CPU and GPU temperatures during long play sessions.
Recommended Hardware
For a smoother shader experience, aim for:
| Component | Recommended Minimum |
| CPU | Quad-Core Processor |
| RAM | 8 GB System Memory |
| GPU | NVIDIA GTX 1050, AMD RX 560, or similar |
| Storage | SSD Preferred |
| Java | Latest Compatible Version |
Even modest hardware can deliver an enjoyable experience with the right shader pack and settings. In the next section, you’ll see how to unlock the highest visual quality on powerful gaming PCs.
High-End PC Settings
A powerful gaming PC lets you experience Minecraft OptiFine shaders at their best. You can enable advanced effects without sacrificing smooth gameplay. Start with the Ultra preset and fine-tune each option for your hardware.
Ultra Presets
Ultra presets unlock the highest visual quality available in most shader packs. They increase detail, improve lighting accuracy, and create a more immersive world.
Use these settings as a starting point.
| Setting | Recommended Value |
| Shadow Quality | Ultra |
| Shadow Resolution | 4096×4096 or 8192×8192 |
| Render Quality | 1.5x–2.0x |
| Reflection Quality | Ultra |
| Water Quality | Ultra |
| Volumetric Fog | High |
| Cloud Quality | High |
| Bloom | High |
| Depth of Field | On |
| Motion Blur | Optional |
| Anti-Aliasing | TAA or Highest Available |
| PBR Materials | Enabled |
| Normal Maps | Enabled |
| Height Maps | Enabled |
| Smooth Lighting | Maximum |
| Render Distance | 24–32 Chunks |
These settings deliver realistic environments, detailed textures, and cinematic lighting.
Ray-Like Effects
OptiFine shaders cannot provide hardware-accelerated ray tracing on their own. However, many modern shader packs simulate similar effects through advanced lighting techniques.
Popular ray-like features include:
- Realistic global illumination
- Soft dynamic shadows
- Screen-space reflections
- Water reflections and refraction
- Volumetric lighting
- Atmospheric scattering
- Ambient occlusion
- Light shafts and sun rays
- PBR material support
Shader packs such as Complementary Shaders, SEUS Renewed, and BSL Shaders create these effects using advanced OpenGL rendering techniques.
Maximum Quality
Use these tips to achieve the best visual experience.
- Enable the highest shadow resolution.
- Turn on PBR materials when available.
- Use high-resolution resource packs with compatible PBR textures.
- Increase reflection and water quality.
- Enable volumetric fog for realistic depth.
- Keep anti-aliasing enabled to smooth object edges.
- Increase render distance if your GPU maintains stable FPS.
- Install the latest GPU drivers for better compatibility.
Recommended Hardware
| Component | Recommended Specification |
| CPU | Modern 6-Core or 8-Core Processor |
| RAM | 16–32 GB |
| GPU | NVIDIA RTX 3070 or Better / AMD RX 6800 XT or Better |
| VRAM | 8 GB or More |
| Storage | SSD or NVMe SSD |
| Display | 1440p or 4K Monitor (Optional) |
High-end hardware allows you to enjoy realistic lighting, detailed reflections, cinematic skies, and smooth gameplay together. In the next section, you’ll compare OptiFine shaders with other popular shader solutions to find the best option for your setup.
OptiFine Shaders vs Iris Shaders
OptiFine and Iris both let you use shader packs in Minecraft Java Edition. However, they take different approaches. OptiFine combines graphics optimization and shader support in one mod. Iris focuses on shader compatibility and works with the Fabric ecosystem.
Neither option is better for everyone. The right choice depends on your Minecraft setup, preferred mods, and performance goals.
OptiFine vs Iris Comparison
| Feature | OptiFine Shaders | Iris Shaders |
| Installation | Standalone installer with built-in shader support | Requires Fabric and the Iris mod |
| Performance | Excellent on most systems | Often delivers higher FPS, especially with Sodium |
| Features | Built-in graphics optimization, zoom, connected textures, dynamic lighting, shader support | Dedicated shader loader with modern rendering optimization |
| Compatibility | Works with many OptiFine-supported shader packs | Supports most modern shader packs through the Iris renderer |
| Updates | Updates depend on new OptiFine releases | Frequent updates with the Fabric ecosystem |
| Resource Packs | Excellent support for HD textures, CIT, CEM, and connected textures | Supports resource packs, but some OptiFine-exclusive features require additional Fabric mods |
| Ease of Use | Simple installation for beginners | Slightly more setup because Fabric is required |
| Forge Support | Compatible with many Forge setups, depending on Minecraft version | No native Forge support |
| Fabric Support | Limited support through compatibility solutions | Native Fabric support |
Choose OptiFine If
- You want an all-in-one graphics optimization mod.
- You prefer a simple installation process.
- You use OptiFine-exclusive features like connected textures and custom entity models.
- You play with Forge-compatible setups that support OptiFine.
Choose Iris If
- You already use the Fabric mod loader.
- You want the highest possible FPS.
- You plan to pair Iris with Sodium for better performance.
- You prefer frequent updates and a modern rendering pipeline.
Which One Should You Choose?
Choose OptiFine if you want an easy setup with built-in graphics improvements and shader support.
Choose Iris if you use Fabric and want maximum performance with modern optimization mods.
Both projects support many popular shader packs, including Complementary Shaders, BSL Shaders, SEUS Renewed, and Sildur’s Vibrant Shaders. Your final choice should match your mod loader, hardware, and gameplay style.
The next section explains which Minecraft versions support OptiFine shaders and how to choose the correct version for your game.
Shader Compatibility
Minecraft OptiFine shaders only work when your shader pack matches your OptiFine and Minecraft versions. Using the correct combination prevents crashes, missing textures, and loading errors.
Before installing a shader pack, verify its supported Minecraft version. Most developers list compatibility on the download page.
Minecraft 1.21
Minecraft 1.21 supports OptiFine shader packs designed for the 1.21 release.
Many popular shader packs, including Complementary Shaders, BSL Shaders, SEUS Renewed, and Sildur’s Vibrant Shaders, added support after OptiFine released compatible builds.
Always use the OptiFine version created specifically for Minecraft 1.21. Do not use builds for newer patch versions.
Minecraft 1.21.1
Minecraft 1.21.1 introduced its own OptiFine release with updated compatibility.
If you play on Minecraft 1.21.1, install the matching OptiFine version. Do not use the 1.21 build because Minecraft patch versions are not interchangeable.
Minecraft 1.21.x
Each Minecraft 1.21.x update may require a dedicated OptiFine build. New game updates often change rendering behavior, so older OptiFine versions may stop working correctly.
Before updating Minecraft:
- Check whether OptiFine supports the new version.
- Download the matching OptiFine release or preview build.
- Confirm your shader pack also supports the same version.
- Update resource packs if required.
Following these steps helps avoid crashes and graphical glitches after major updates.
Older Versions
Many shader packs continue to support older Minecraft releases.
Common supported versions include:
- Minecraft 1.20.6
- Minecraft 1.20.4
- Minecraft 1.20.1
- Minecraft 1.19.4
- Minecraft 1.19.2
- Minecraft 1.18.2
- Minecraft 1.17.1
- Minecraft 1.16.5
Older OptiFine versions remain available through the official downloads archive. This makes it easy to install shader packs for legacy Minecraft worlds.
Compatibility Tips
- Match your Minecraft version with the correct OptiFine build.
- Download shader packs from trusted developers.
- Read the shader pack’s compatibility notes.
- Update OptiFine before installing a newer shader pack.
- Back up your world before upgrading Minecraft versions.
Using compatible versions ensures stable gameplay, better performance, and the best visual experience with Minecraft OptiFine shaders.
System Requirements
Minecraft OptiFine shaders require more processing power than the default game. The exact requirements depend on your shader pack and graphics settings. Lightweight shaders run well on budget PCs, while cinematic shaders need modern gaming hardware.
Minimum Requirements
These specifications help you run lightweight shader packs with basic visual effects.
| Component | Minimum Requirement |
| Operating System | Windows, macOS, or Linux |
| Minecraft Edition | Minecraft Java Edition |
| CPU | Intel Core i3 (6th Gen) or AMD Ryzen 3 |
| GPU | NVIDIA GTX 1050, AMD Radeon RX 560, or Intel Arc A380 |
| System RAM | 8 GB |
| Storage | 2 GB Free Space |
| Java | Latest Java version compatible with your Minecraft release |
| Internet | Required for downloads and updates |
Recommended Requirements
These specifications provide a smoother experience with most modern shader packs.
| Component | Recommended Specification |
| Operating System | Windows 10/11, macOS, or Linux |
| CPU | Intel Core i5/i7 or AMD Ryzen 5/7 |
| GPU | NVIDIA RTX 3060 or AMD Radeon RX 6700 XT or better |
| Graphics Memory (VRAM) | 8 GB or More |
| System RAM | 16 GB |
| Storage | SSD or NVMe SSD |
| Display | 1080p or Higher |
GPU Requirements
Your graphics card has the greatest impact on shader performance.
For the best experience:
- Use a dedicated GPU instead of integrated graphics.
- Keep your graphics driver updated.
- Match shader quality to your GPU’s performance.
- Enable the dedicated GPU on gaming laptops.
High-end shader packs with advanced reflections, PBR materials, and volumetric lighting benefit from modern GPUs with at least 8 GB of VRAM.
RAM
Minecraft needs enough memory to load shader packs and world data smoothly.
Use these recommendations:
| System Memory | Recommended Minecraft Allocation |
| 8 GB | 3–4 GB |
| 16 GB | 4–6 GB |
| 32 GB or More | 6–8 GB |
Avoid allocating all available RAM to Minecraft. Leave enough memory for your operating system and background tasks.
Java Version
OptiFine runs on Java, so installing the correct version is important.
Follow these guidelines:
- Use the Java version recommended for your Minecraft release.
- Download Java from the official source.
- Keep Java updated to improve compatibility and stability.
- Restart your computer after installing or updating Java if required.
Quick Checklist
✔ Minecraft Java Edition installed
✔ Compatible OptiFine version
✔ Supported shader pack
✔ Dedicated GPU recommended
✔ Enough available RAM
✔ Latest compatible Java version
Meeting these requirements helps you enjoy stable gameplay, smoother FPS, and the full visual potential of Minecraft OptiFine shaders.
Troubleshooting
Even a small setup issue can prevent Minecraft OptiFine shaders from working correctly. Most problems have simple fixes. Follow the solutions below before reinstalling Minecraft or OptiFine.
Shaders Not Showing
If the shader list is empty, Minecraft cannot detect your shader pack.
Try these fixes:
- Place the shader pack inside the shaderpacks folder.
- Keep the shader pack as a ZIP file.
- Launch Minecraft with the OptiFine profile.
- Restart Minecraft after adding the shader pack.
- Check that the shader pack supports your Minecraft version.
Black Screen
A black screen usually points to incompatible settings or unsupported hardware.
Try these solutions:
- Switch to another shader pack.
- Lower render quality.
- Disable anti-aliasing.
- Update your graphics driver.
- Reset shader settings to their default values.
Low FPS
Heavy shader effects can reduce performance.
Improve FPS by:
- Lowering shadow quality.
- Reducing render distance.
- Disabling volumetric fog.
- Turning off motion blur.
- Choosing a lighter shader preset.
- Closing background applications.
Missing Textures
Missing or broken textures often result from incompatible resource packs.
To fix the problem:
- Disable the resource pack temporarily.
- Update the resource pack.
- Enable PBR textures only when supported.
- Reload the shader pack from the Shaders menu.
Crashes
Minecraft may crash when versions do not match.
Check the following:
- Minecraft version
- OptiFine version
- Shader pack version
- Java version
Update any outdated components before launching the game again.
Installation Errors
Installation problems usually occur before Minecraft starts.
Common fixes include:
- Install the latest compatible Java version.
- Download OptiFine from the official website.
- Run the OptiFine installer again.
- Make sure Minecraft Java Edition starts normally without OptiFine.
OpenGL Errors
OpenGL errors often indicate outdated graphics software.
Fix them by:
- Updating your GPU driver.
- Using a graphics card that supports the required OpenGL version.
- Selecting the dedicated GPU on laptops.
- Restarting your computer after updating drivers.
Shader Compilation Errors
Minecraft compiles shader files when you enable a shader pack.
Compilation errors usually mean the shader pack is incompatible.
To resolve them:
- Download the latest shader pack release.
- Match the shader pack with your OptiFine version.
- Remove old or modified shader files.
- Test another shader pack to confirm the issue.
Compatibility Issues
Not every shader pack supports every Minecraft release.
Before installing a shader pack:
- Check the supported Minecraft version.
- Verify OptiFine compatibility.
- Read the developer’s release notes.
- Update Java if required.
- Disable conflicting graphics mods.
Quick Troubleshooting Checklist
✔ Use the latest compatible OptiFine version.
✔ Install the correct Java version.
✔ Update your graphics driver.
✔ Keep shader packs in ZIP format.
✔ Match Minecraft, OptiFine, and shader pack versions.
✔ Restart Minecraft after every major change.
Following these steps solves most shader problems and helps you return to the game quickly.
Safety
Downloading Minecraft OptiFine shaders is safe when you use official and trusted sources. Most security problems happen because users download fake installers or files from unofficial websites.
Are OptiFine Shaders Safe?
Yes. OptiFine itself is widely used by the Minecraft Java Edition community. It adds shader support but does not include shader packs. You must download shader packs separately from trusted developers or approved repositories. Official documentation recommends downloading compatible shader packs from trusted sources and keeping them as .zip files.
Remember that every shader pack comes from its own developer. Always verify the download source before installing any file.
Official Sources
Use official websites whenever possible.
Recommended sources include:
- OptiFine for the latest OptiFine releases.
- Official shader developer websites.
- Trusted platforms such as Modrinth, CurseForge, and Planet Minecraft when the developer publishes there.
OptiFine’s documentation also recommends using the official downloads page or the official mirror to obtain the correct .jar installer for your Minecraft version.
Fake Downloads
Many fake websites copy the appearance of popular Minecraft download pages.
Stay safe by following these tips:
- Download OptiFine only from its official website or official mirror.
- Download shader packs from trusted developers.
- Avoid websites that promise “premium” or “cracked” shader packs.
- Do not download unexpected .exe installers for OptiFine.
- Verify that your OptiFine download is a .jar file.
- Leave shader packs as .zip files.
The official troubleshooting guide warns users not to run files if they did not receive the expected .jar installer.
Virus Concerns
OptiFine and reputable shader packs are not known for containing malware when downloaded from legitimate sources. The real risk comes from unofficial websites, misleading advertisements, or fake download buttons. Community moderators also regularly warn users about fake OptiFine websites and recommend using only official download sources.
Modern browsers such as Google Chrome may display warnings for downloaded files or block suspicious downloads. Treat these warnings seriously and verify the source before opening any file.
Safe Download Checklist
✔ Download OptiFine from the official website or official mirror.
✔ Download shader packs from trusted developers.
✔ Verify that OptiFine downloads as a .jar file.
✔ Keep shader packs in .zip format.
✔ Scan downloaded files with your antivirus if you have any doubts.
✔ Ignore fake download buttons and misleading advertisements.
Following these practices helps you enjoy Minecraft OptiFine shaders safely while protecting your computer from malicious downloads.
Common Mistakes
Many shader problems happen because of small setup mistakes. Avoiding these common errors saves time and helps Minecraft OptiFine shaders work correctly on the first attempt.
Extracting ZIP Files
Do not extract a shader pack.
Most shader packs come as ZIP files. OptiFine reads them directly from the shaderpacks folder.
If you extract the files, Minecraft may not detect the shader pack.
Correct approach:
- Keep the shader pack as a .zip file.
- Copy the ZIP file into the shaderpacks folder.
- Restart Minecraft if the shader pack does not appear.
Wrong Minecraft Version
Every shader pack supports specific Minecraft versions.
Using an incompatible version can cause crashes, missing textures, or shader loading errors.
Before installing a shader pack:
- Check your Minecraft version.
- Install the matching OptiFine release.
- Verify the shader pack supports that version.
Matching all three versions improves stability and compatibility.
Missing OptiFine
Shader packs cannot run without OptiFine unless you use another compatible shader loader, such as Iris.
If the Shaders button does not appear in Video Settings, Minecraft is not running the OptiFine profile.
To fix this:
- Install OptiFine.
- Select the OptiFine profile in the Minecraft Launcher.
- Launch the game again.
Incorrect Folder
Minecraft only scans one location for traditional OptiFine shader packs.
Place the shader pack here:
.minecraft → shaderpacks
Do not place shader packs in folders such as:
- resourcepacks
- mods
- saves
- downloads
Using the correct folder ensures Minecraft detects the shader pack automatically.
Outdated Java
OptiFine relies on Java to install and run correctly.
An outdated Java version may prevent the installer from opening or cause compatibility issues.
To avoid problems:
- Install the latest Java version supported by your Minecraft release.
- Restart your computer after updating Java if prompted.
- Download Java only from the official website.
Quick Checklist
✔ Keep shader packs in ZIP format.
✔ Match Minecraft, OptiFine, and shader pack versions.
✔ Launch Minecraft with the OptiFine profile.
✔ Place shader packs in the shaderpacks folder.
✔ Keep Java updated.
Avoiding these common mistakes helps you install Minecraft OptiFine shaders successfully and enjoy a smoother gaming experience from the start.
Advanced Topics
Most players can enjoy Minecraft OptiFine shaders without learning the technical details. However, understanding how shader packs work helps you customize settings, solve advanced issues, and appreciate the technology behind modern graphics.
shaders.properties
The shaders.properties file controls global shader settings and user options.
Shader developers use this file to:
- Create configurable settings.
- Enable or disable features.
- Define quality presets.
- Control lighting and shadow options.
- Manage compatibility between shader components.
Many shader packs read this file when Minecraft starts.
GBuffer Programs
GBuffer programs form the first stage of the deferred rendering pipeline.
They collect scene information before lighting calculations begin.
Common data includes:
- Surface color
- Depth
- Surface normals
- Material properties
This information helps shader packs create realistic shadows, reflections, and lighting.
Composite Programs
Composite programs combine data from earlier rendering stages.
They create the final image that appears on your screen.
Many post-processing effects happen here, including:
- Bloom
- Tone mapping
- Color grading
- Motion blur
- Depth of field
- Screen-space reflections
These effects give shader packs their unique visual style.
Shadow Programs
Shadow programs calculate how light interacts with the Minecraft world.
They generate shadow maps for:
- Blocks
- Trees
- Buildings
- Entities
- Terrain
As the sun and moon move, the shadows update automatically. This process creates a more natural-looking world.
OpenGL
OptiFine shaders use OpenGL, a cross-platform graphics API, to communicate with your graphics card.
OpenGL handles:
- Rendering commands
- Texture management
- Shader execution
- Graphics memory
- Display output
Your GPU processes these instructions to produce every frame you see in Minecraft.
Deferred Rendering
Deferred rendering improves lighting accuracy by separating rendering into multiple stages.
Instead of calculating everything at once, the renderer first stores scene information. It then applies lighting and visual effects afterward.
This approach makes advanced features possible, including:
- Dynamic shadows
- Ambient occlusion
- Water reflections
- Volumetric lighting
- Atmospheric scattering
- PBR materials
Many modern OptiFine shader packs rely on deferred rendering for realistic graphics.
PBR Workflow
Physically Based Rendering (PBR) simulates how real-world materials react to light.
Instead of using a flat texture alone, PBR combines multiple texture maps to create realistic surfaces.
Common PBR maps include:
- Albedo (Base Color)
- Normal Map
- Height Map
- Roughness Map
- Specular or Metallic Map
Together, these maps improve stone, wood, metal, glass, and water textures. Light reflects more naturally, making Minecraft worlds feel richer and more immersive.
Understanding these technologies helps you choose better shader packs, adjust advanced settings, and troubleshoot complex rendering issues with confidence.
Related Downloads
Before using Minecraft OptiFine shaders, make sure you have the required software and compatible resources. Download each file from its official source whenever possible. This approach improves security, compatibility, and overall stability.
OptiFine
OptiFine adds shader support and improves Minecraft’s graphics performance. Install the version that matches your Minecraft Java Edition release.
Why You Need It
- Enables shader pack support.
- Improves FPS and graphics settings.
- Adds advanced video options.
- Supports HD textures and custom visual features.
Official Download
https://optifine.net/downloads
Java
Java is required to run the OptiFine installer and Minecraft Java Edition.
Always install the latest Java version supported by your Minecraft release.
Why You Need It
- Runs the OptiFine installer.
- Supports Minecraft Java Edition.
- Improves compatibility and stability.
Official Download
https://www.java.com/download
Minecraft Launcher
The Minecraft Launcher installs, updates, and launches Minecraft Java Edition. It also lets you select the OptiFine profile after installation.
Why You Need It
- Launches Minecraft Java Edition.
- Manages game versions.
- Selects the OptiFine profile.
- Downloads official game updates.
Official Download
https://www.minecraft.net/download
Shader Packs
Shader packs add realistic lighting, reflections, shadows, and other visual effects to Minecraft.
Choose a shader pack that matches both your Minecraft and OptiFine versions.
Popular choices include:
- Complementary Shaders
- BSL Shaders
- SEUS Renewed
- Sildur’s Vibrant Shaders
- Project LUMA
- Vanilla Plus
Download shader packs only from their official developer websites.
Resource Packs
Resource packs improve textures, models, fonts, and user interface elements.
Many modern resource packs also include PBR textures that work with compatible shader packs.
Popular resource pack websites include official developer pages and trusted Minecraft communities.
Before installing a resource pack:
- Check version compatibility.
- Verify PBR support if needed.
- Match it with your shader pack.
Quick Download Checklist
| Download | Required | Purpose |
| OptiFine | ✅ | Enables shader support and graphics optimization |
| Java | ✅ | Runs OptiFine and Minecraft Java Edition |
| Minecraft Launcher | ✅ | Launches the game and manages versions |
| Shader Pack | ✅ | Adds realistic graphics and lighting |
| Resource Pack | Optional | Improves textures and supports PBR materials |
Downloading these files from trusted sources helps ensure a safe installation and the best experience with Minecraft OptiFine shaders.
FAQs About Minecraft OptiFine Shaders
What are Minecraft OptiFine shaders?
Minecraft OptiFine shaders are visual enhancement packs that improve lighting, shadows, reflections, water, and other graphics effects in Minecraft Java Edition.
Are OptiFine shaders free?
Yes. Most OptiFine shader packs are free to download. Some developers also offer optional paid versions with extra features.
Do shaders reduce FPS?
Yes. Shader packs require additional GPU resources, so FPS usually decreases. Choosing lighter shader presets helps improve performance.
Which shader pack is best?
Complementary Shaders offer the best balance of graphics and performance. BSL Shaders, SEUS Renewed, and Sildur’s Vibrant Shaders are also popular choices.
Can I use shaders without OptiFine?
Yes. You can also use Iris Shaders with the Fabric mod loader. Traditional OptiFine shader packs require OptiFine or another compatible shader loader.
How do I install shader packs?
Install OptiFine, place the shader pack ZIP file inside the shaderpacks folder, then select it from the Shaders menu.
Why aren’t my shaders appearing?
Your shader pack may be in the wrong folder, extracted from the ZIP file, or incompatible with your Minecraft version.
Which shaders work best on low-end PCs?
Sildur’s Vibrant Shaders Lite, Chocapic13 Low, Vanilla Plus, and Complementary Performance provide good visuals with better FPS.
What is deferred rendering?
Deferred rendering stores scene data first and applies lighting afterward. This method creates realistic shadows, reflections, and advanced visual effects.
What is PBR?
Physically Based Rendering (PBR) simulates how real-world materials react to light. It makes blocks appear more detailed and realistic.
What is a GBuffer?
A GBuffer stores information such as color, depth, and surface normals before lighting calculations begin.
What are Vertex Shaders?
Vertex shaders calculate the position and movement of 3D objects before rendering begins.
What are Fragment Shaders?
Fragment shaders determine the final color of each visible pixel. They create lighting, shadows, reflections, and other visual effects.
What is Ambient Occlusion?
Ambient occlusion darkens corners and nearby surfaces to create realistic depth and smoother lighting.
What is Volumetric Fog?
Volumetric fog adds realistic depth by simulating light passing through fog, clouds, and the atmosphere.
Which shaders support ray-like effects?
Complementary Shaders, SEUS Renewed, and BSL Shaders simulate ray-like lighting with advanced rendering techniques.
Can I use Forge with shaders?
Yes. Many OptiFine versions support Forge. Always check compatibility before installing both together.
Can I use Fabric?
Yes. Fabric users typically install Iris Shaders for native shader support.
What GPU do I need?
A dedicated GPU provides the best experience. Lightweight shaders can run on entry-level graphics cards, while high-end shaders benefit from modern gaming GPUs.
Which OptiFine version supports shaders?
Every modern OptiFine release includes shader support. Always install the version that matches your Minecraft version.
Can I install multiple shader packs?
Yes. Place multiple ZIP files inside the shaderpacks folder and switch between them in Minecraft.
Why is Minecraft crashing with shaders?
Crashes usually happen because of incompatible Minecraft, OptiFine, Java, or shader pack versions. Updating these components often resolves the issue.
How do I improve FPS with shaders?
Lower shadow quality, reduce render distance, disable demanding effects, and choose a lightweight shader preset.
Are shader packs safe?
Yes. Download shader packs only from official developer websites or trusted Minecraft communities.
Which shader is the most realistic?
SEUS Renewed, Complementary Shaders, Project LUMA, and BSL Shaders deliver some of the most realistic visuals available.
Can I use resource packs with shaders?
Yes. Many shader packs work with resource packs. PBR-compatible resource packs provide even better lighting and surface detail.
Do OptiFine shaders work on macOS and Linux?
Yes. OptiFine shaders support Windows, macOS, and Linux, provided your hardware and graphics drivers meet the requirements.
Should I extract the shader ZIP file?
No. Keep the shader pack as a ZIP file. Place it directly inside the shaderpacks folder.
Do shaders change Minecraft gameplay?
No. Shader packs only improve graphics. They do not change game mechanics, blocks, mobs, or survival features.
How do I update a shader pack?
Download the latest version from the official developer, replace the old ZIP file in the shaderpacks folder, and restart Minecraft if needed.
Conclusion
Minecraft OptiFine shaders transform Minecraft Java Edition with realistic lighting, dynamic shadows, detailed water, and immersive visual effects. Whether you want higher-quality graphics or a more cinematic world, the right shader pack can completely change your gameplay experience.
For the best results, always choose a shader pack that matches your Minecraft and OptiFine versions. Download OptiFine and shader packs only from their official websites to ensure security, compatibility, and the latest updates.
Every computer performs differently, so take time to adjust your shader settings. Lower demanding effects on entry-level systems, or enable advanced features on powerful gaming PCs. Finding the right balance between image quality and FPS creates a smoother and more enjoyable experience.
Finally, keep OptiFine, Java, graphics drivers, and your shader packs updated. Regular updates improve compatibility, fix bugs, and support the latest Minecraft releases. With the right setup, you can enjoy stunning visuals while maintaining stable performance in every Minecraft adventure.