
Minecraft OptiFine 1.17 Download, Installation, FPS Boost, Shaders and Complete Guide (2026)
Minecraft OptiFine 1.17 is one of the most popular optimization mods for Minecraft Java Edition. It improves game performance, unlocks advanced graphics settings, and supports HD textures and shaders. Many players use OptiFine 1.17 to increase FPS, reduce lag, and enjoy smoother gameplay without changing the core Minecraft experience.
If you want better visuals or higher frame rates, Minecraft 1.17 OptiFine offers a simple solution. It adds features like Dynamic Lighting, Connected Textures, custom sky effects, anti-aliasing, and advanced video settings. These improvements help both low-end and high-end PCs deliver a better gaming experience.
This guide covers everything you need to know about OptiFine for Minecraft 1.17. You’ll learn how to download the correct version, install it on Windows, macOS, and Linux, and use it with Forge when supported. We’ll also explain the best FPS settings, compatible shader packs, resource packs, Java requirements, common errors, and practical fixes.
Whether you are a beginner installing OptiFine 1.17 for the first time or an experienced player looking to fine-tune performance, this guide will help you make informed decisions. Every section follows current compatibility information and widely accepted installation practices for Minecraft Java Edition.
To ensure accuracy, this guide references official OptiFine release information and established Minecraft resources where appropriate. It focuses on verified guidance instead of shortcuts or unsupported methods, helping you install and configure Minecraft OptiFine 1.17 safely and confidently.
By the end of this guide, you’ll understand which OptiFine version to choose, how to install it correctly, how to maximize FPS, enable shaders and HD resource packs, solve common issues, and decide whether Minecraft OptiFine 1.17 is still the right optimization tool for your setup.
What Is Minecraft OptiFine 1.17?
Minecraft OptiFine 1.17 is a performance and graphics optimization mod for Minecraft Java Edition. It improves how the game renders worlds, manages graphics, and uses your computer’s hardware. The mod adds advanced video settings that are not available in the vanilla game. These settings help players achieve smoother gameplay, higher FPS, and better visual quality.
OptiFine was created by sp614x, an independent Minecraft mod developer. Since its first release, it has become one of the most trusted optimization mods in the Minecraft community. Millions of Java Edition players have used it to improve performance and unlock advanced graphics features across multiple Minecraft versions.
Unlike many Minecraft mods, OptiFine 1.17 focuses on improving the game’s performance without changing its core gameplay. It keeps the familiar Minecraft experience while giving players more control over graphics, lighting, textures, and rendering options.
Purpose of OptiFine 1.17
The main goal of OptiFine for Minecraft 1.17 is to make Minecraft run faster while improving its appearance. It helps reduce lag, stabilize frame rates, and optimize resource usage. At the same time, it enables features that make the game world look more detailed and immersive.
Players use OptiFine to:
- Increase FPS on low-end and high-end PCs.
- Unlock advanced graphics settings.
- Enable shader pack support.
- Use HD resource packs and textures.
- Improve chunk rendering and loading.
- Customize visual effects for better performance or quality.
These improvements allow players to choose between maximum performance, stunning graphics, or a balanced experience.
A Brief History of OptiFine
OptiFine has evolved alongside Minecraft for many years. Every major Minecraft update introduces changes to the game’s rendering system, requiring OptiFine to adapt. The release of Minecraft 1.17, also known as Caves & Cliffs Part I, brought significant rendering changes and new blocks, making compatibility more challenging.
To support these updates, OptiFine introduced several preview builds before releasing more stable versions for Minecraft 1.17.1. This development process ensured players could enjoy performance improvements while maintaining compatibility with the latest Java Edition features.
Built for Minecraft Java Edition
Minecraft OptiFine 1.17 works only with Minecraft Java Edition. It does not support Minecraft Bedrock Edition because the two editions use different game engines and rendering systems.
Java Edition gives mods direct access to many game components. This flexibility allows OptiFine to improve graphics rendering, optimize memory usage, and add advanced visual settings that are unavailable in the Bedrock version.
Why OptiFine 1.17 Became So Popular
OptiFine earned its reputation by solving one of Minecraft’s biggest challenges: inconsistent performance. Large worlds, complex builds, and long render distances can reduce FPS, even on capable hardware. OptiFine addresses these issues through efficient graphics optimization and smarter rendering techniques.
Its popularity also comes from features that many players consider essential. The built-in zoom function, Dynamic Lights, Connected Textures, Custom Sky, Better Grass, and shader support have become standard tools for builders, survival players, content creators, and PvP enthusiasts.
Another reason for its success is accessibility. Players can install OptiFine without learning advanced modding, making it an excellent choice for beginners and experienced users alike.
Benefits Over Vanilla Minecraft
Vanilla Minecraft offers a stable gameplay experience, but its graphics options remain limited. Minecraft 1.17 OptiFine expands these options while improving overall efficiency.
Compared to vanilla Minecraft, OptiFine provides:
- Higher and more stable FPS.
- More detailed graphics settings.
- Better render distance management.
- Support for HD textures.
- Full shader compatibility.
- Improved chunk loading.
- Enhanced lighting effects.
- Greater control over animations and visual quality.
These features allow players to tailor the game to their hardware instead of relying on one default configuration.
How OptiFine 1.17 Works
At its core, OptiFine improves Minecraft by optimizing the game’s rendering engine. The rendering engine determines how blocks, entities, lighting, particles, and textures appear on your screen. OptiFine refines this process to reduce unnecessary work and improve efficiency.
It also enhances how Minecraft communicates with OpenGL, the graphics API used by Minecraft Java Edition to render game visuals. By optimizing rendering tasks, adjusting graphics calculations, and providing advanced configuration options, OptiFine reduces system load while maintaining visual quality.
Instead of forcing one graphics profile, OptiFine lets players choose settings that match their hardware. A low-end PC can prioritize FPS, while a high-end gaming system can enable advanced shaders, HD textures, and enhanced visual effects without sacrificing stability.
This combination of performance tuning and visual customization has made OptiFine 1.17 the preferred optimization tool for Minecraft Java Edition players across a wide range of systems.
Why Players Still Use OptiFine 1.17
Although newer Minecraft versions exist, many players continue using Minecraft OptiFine 1.17. Some enjoy long-running survival worlds, while others play on servers or modpacks built for Minecraft 1.17. OptiFine helps these players improve performance and graphics without changing the game’s core mechanics.
Its balance of speed, customization, and visual quality keeps it relevant for many Java Edition users.
Higher FPS and Better Performance
The biggest reason players install OptiFine 1.17 is its ability to improve FPS. Minecraft can become demanding when you increase render distance, load large worlds, or install high-resolution resource packs.
OptiFine reduces unnecessary rendering work and gives players detailed performance settings. You can adjust render distance, entity distance, animations, particles, and lighting to match your hardware.
These optimizations help:
- Increase frame rates.
- Reduce lag spikes.
- Speed up chunk loading.
- Improve world rendering.
- Lower GPU and CPU workload.
Players with older computers often notice the biggest improvements, but modern gaming PCs also benefit from smoother frame delivery.
Better Visual Quality
OptiFine enhances Minecraft’s appearance without changing its iconic style. It unlocks advanced graphics settings that let players create a more detailed and immersive world.
Players can customize:
- Lighting quality.
- Clouds.
- Fog.
- Water effects.
- Grass rendering.
- Sky colors.
- Texture quality.
- Animation settings.
These options let players prioritize visual quality or performance based on their preferences.
Built-In Zoom Feature
The built-in Zoom feature remains one of OptiFine’s most popular tools. Players can inspect distant structures, mobs, or terrain without installing another mod.
Builders use Zoom to place blocks accurately. Adventure players use it to explore landscapes. PvP players use it to monitor distant opponents or landmarks.
The feature is lightweight, easy to use, and integrated directly into OptiFine.
Dynamic Lighting
Dynamic Lighting allows light sources to illuminate the world while you hold them. Torches, lanterns, glowstone, and other light-emitting items brighten nearby areas without placing blocks.
This feature improves cave exploration and nighttime travel. It also creates a smoother gameplay experience by reducing the need to stop and place torches constantly.
HD Textures and Resource Packs
Vanilla Minecraft supports basic textures, but OptiFine for Minecraft 1.17 expands resource pack compatibility.
Players can use:
- HD texture packs.
- Connected Textures.
- Custom Entity Models.
- Emissive Textures.
- Random Entity Textures.
- High-resolution fonts.
These enhancements make worlds look sharper while preserving Minecraft’s familiar art style.
Smoother Gameplay
OptiFine improves more than raw FPS. It also reduces frame drops and sudden stuttering during gameplay. Features like Smooth FPS, Smooth World, Smart Animations, and optimized chunk rendering help create a more consistent experience. Stable frame times often make gameplay feel smoother than simply increasing average FPS. This consistency benefits survival players, builders, explorers, and PvP enthusiasts alike.
Better Shader Compatibility
Many of Minecraft’s most popular shader packs rely on OptiFine. Players install it to enjoy realistic lighting, shadows, reflections, waving vegetation, and enhanced water effects.
Popular shader packs include:
- BSL Shaders.
- Complementary Shaders.
- Sildur’s Vibrant Shaders.
- SEUS Renewed.
- Chocapic13.
- ProjectLUMA.
OptiFine also provides shader settings that help balance image quality and performance on different hardware.
Lower Hardware Requirements
Not everyone owns a high-end gaming computer. One of OptiFine’s greatest strengths is its flexibility across different systems. Players with older CPUs, integrated graphics, or limited RAM can lower demanding graphics settings while maintaining enjoyable gameplay. At the same time, powerful systems can enable HD textures, advanced shaders, longer render distances, and higher-quality lighting. This flexibility makes Minecraft OptiFine 1.17 suitable for a wide range of hardware configurations.
Minecraft 1.17 Overview
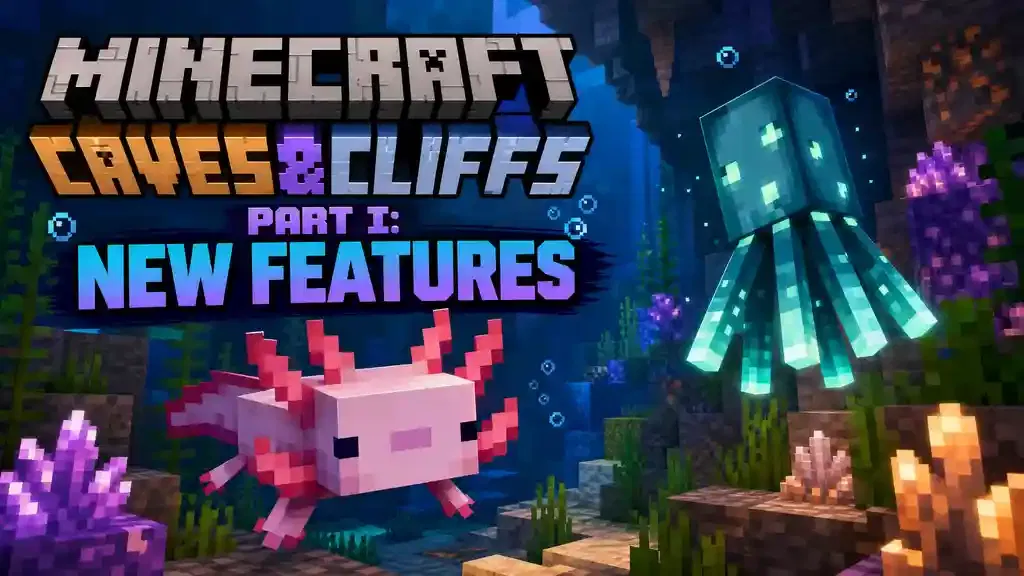
Minecraft 1.17, officially known as Caves and Cliffs Part I, introduced one of the game’s largest technical and content updates. Released for Minecraft Java Edition, it expanded world-building options with new blocks, unique mobs, and improved gameplay mechanics. These additions also increased the demands on Minecraft’s rendering system. As a result, many players turned to OptiFine 1.17 to maintain smooth performance while enjoying the new content.
Caves and Cliffs Part I
Caves and Cliffs Part I focused on expanding underground exploration and building possibilities. While the complete cave generation arrived later, Part I introduced many new materials, decorative blocks, and gameplay features that changed how players explored and built. The update laid the foundation for future world generation improvements while keeping existing worlds compatible and Does OptiFine Make Minecraft Run Better.
New Mobs
Minecraft 1.17 introduced several unique mobs that added new mechanics and interactions.
Notable additions include:
- Axolotl
- Glow Squid
- Goat
Each mob brought new behaviors, animations, and environmental interactions. These features increased visual complexity, especially in larger worlds.
New Blocks
The update also introduced many new building blocks and decorative materials.
Popular additions include:
- Copper Blocks
- Amethyst Blocks
- Amethyst Clusters
- Calcite
- Tuff
- Dripstone Blocks
- Moss Blocks
- Deepslate Variants
- Glow Lichen
- Rooted Dirt
- Azalea
These blocks gave builders more creative freedom but also increased the variety of textures and rendering tasks.
New Rendering Changes
Minecraft 1.17 included several internal rendering and technical changes. Mojang updated parts of the game’s graphics pipeline and moved the Java Edition client to Java 16.
These changes affected how Minecraft handled rendering, lighting, and resource management. Because OptiFine works closely with Minecraft’s rendering engine and OpenGL, every major update required significant redevelopment and testing.This explains why OptiFine initially released several preview versions before stable builds became available.
Why OptiFine Needed Updates
OptiFine integrates deeply with Minecraft’s graphics systems. Even small changes to rendering code can affect compatibility.
The transition to Minecraft 1.17 introduced:
- Updated rendering behavior.
- New graphical assets.
- Java 16 support.
- New lighting calculations.
- Additional block models.
- Expanded texture handling.
To maintain performance improvements and advanced graphics features, OptiFine had to adapt to these changes. The developer released preview builds first, gathered community feedback, fixed bugs, and then delivered more stable releases for Minecraft 1.17.1.
Version Compatibility
When choosing Minecraft OptiFine 1.17, players should match the OptiFine version to their exact Minecraft version.
General compatibility includes:
- OptiFine 1.17 for Minecraft 1.17.
- OptiFine 1.17.1 for Minecraft 1.17.1.
Using the correct version helps prevent crashes, missing profiles, shader issues, and mod conflicts. It also ensures the best compatibility with supported Forge builds, shader packs, and HD resource packs discussed later in this guide.
OptiFine 1.17 Version History
OptiFine 1.17 went through several preview and stable releases before reaching a mature state. This development cycle was necessary because Minecraft 1.17 (Caves and Cliffs Part I) introduced major rendering changes and required Java 16, making compatibility more challenging than previous updates.
The developer, sp614x, first released preview builds to gather community feedback and identify issues. Each new release improved stability, fixed bugs, and expanded compatibility with Minecraft, shaders, and Forge.
The table below highlights the most important OptiFine 1.17 and 1.17.1 releases.
| Version | Release Type | Status | Important Changes | Bug Fixes | Forge Compatibility |
|---|---|---|---|---|---|
| HD U G9 Preview | Preview | Development Build | First public preview for Minecraft 1.17. Introduced basic FPS optimization, graphics improvements, and early shader support. | Limited fixes. Intended for testing only. | Not recommended. Compatibility was limited. |
| HD U G9 Pre Releases | Preview | Testing Phase | Added support for more Minecraft 1.17 features. Improved rendering, lighting, and resource pack compatibility. | Fixed rendering glitches, startup errors, and stability issues reported by early testers. | Partial compatibility. Some Forge builds worked better than others. |
| HD U G9 | Stable | Stable Release | First stable OptiFine release for Minecraft 1.17. Improved graphics optimization, shader support, HD textures, and performance. | Fixed many preview bugs and improved overall stability. | Better than preview builds, but compatibility depended on the Forge version. |
| HD U H1 | Stable Update | Recommended | Updated for Minecraft 1.17.1. Improved shader compatibility, rendering performance, and support for newer Java environments. | Fixed crashes, graphical artifacts, and several resource pack issues. | Improved Forge compatibility with supported builds. |
| HD U H2 | Stable Update | Latest Stable in the H Series | Further refined performance, stability, and compatibility. Enhanced support for shaders, resource packs, and newer graphics drivers. | Resolved additional rendering bugs, startup problems, and compatibility issues reported by users. | Most reliable Forge compatibility among the listed releases when paired with supported Forge versions. |
How OptiFine 1.17 Improved Over Time
Every release focused on making Minecraft OptiFine 1.17 more reliable and efficient. Early preview versions helped identify compatibility problems caused by Minecraft’s updated rendering engine. Stable releases then refined these improvements through bug fixes and performance tuning.
Key improvements across the release cycle included:
- Higher and more stable FPS.
- Better OpenGL rendering performance.
- Improved shader compatibility.
- More reliable HD texture support.
- Better handling of Connected Textures.
- Enhanced Dynamic Lighting performance.
- Improved chunk rendering.
- Greater stability on Windows, macOS, and Linux.
- Better compatibility with Minecraft Java Edition updates.
Which Version Should You Choose?
The best version depends on your Minecraft installation.
- Use HD U G9 if you play Minecraft 1.17.
- Use HD U H2 if you play Minecraft 1.17.1 and want the latest improvements.
- Avoid older preview builds unless you need them for testing or a specific legacy setup.
Most players should choose the newest stable release that matches their exact Minecraft version. Stable builds provide better performance, fewer crashes, improved shader support, and stronger compatibility with supported Forge versions and HD resource packs.
Main Features of Minecraft OptiFine 1.17
Minecraft OptiFine 1.17 offers much more than an FPS boost. It improves nearly every aspect of Minecraft Java Edition, from rendering performance to graphics quality. Whether you play on a low-end laptop or a high-end gaming PC, OptiFine gives you detailed control over how the game looks and performs.
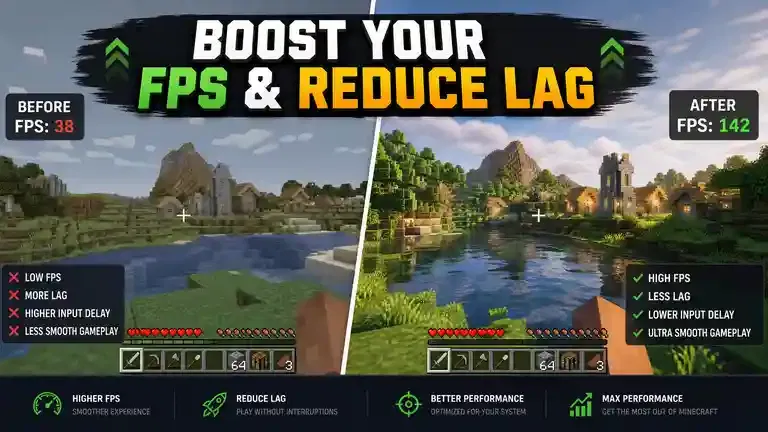
Below are the features that make OptiFine 1.17 one of the most popular Minecraft optimization mods.
FPS Boost
The primary reason players install OptiFine 1.17 is to increase FPS. The mod optimizes how Minecraft processes and renders the game world. This reduces unnecessary work for your hardware and delivers smoother gameplay.
Chunk Optimization
Minecraft constantly loads and unloads chunks as you move. OptiFine improves this process by rendering chunks more efficiently.
Benefits include:
- Faster chunk loading.
- Fewer lag spikes.
- Reduced world-loading delays.
- Better exploration performance.
Large worlds feel smoother because the game spends less time processing distant chunks.
Rendering Improvements
OptiFine refines Minecraft’s rendering engine by reducing unnecessary rendering tasks. It gives players precise control over graphics settings that affect performance.
You can adjust:
- Render Distance
- Simulation Distance
- Entity Distance
- Particle Effects
- Clouds
- Fog
- Shadows
- Animations
Lower settings reduce system load and improve FPS.
CPU Optimization
Minecraft relies heavily on the CPU. OptiFine reduces unnecessary calculations and background processing.
This helps:
- Lower CPU usage.
- Reduce stuttering.
- Improve world generation.
- Maintain stable frame rates.
Older processors often benefit the most.
GPU Optimization
OptiFine also improves how Minecraft communicates with OpenGL, the graphics API used by Minecraft Java Edition.
The result includes:
- Better graphics rendering.
- Reduced GPU workload.
- Improved texture handling.
- More consistent frame rates.
Players with NVIDIA, AMD, or Intel graphics can fine-tune settings to match their hardware.
Dynamic Lighting
Dynamic Lighting allows light sources to illuminate nearby areas while you carry them.
Instead of placing a torch, you can simply hold one to light dark caves and tunnels.
Supported light sources include:
- Torches
- Lanterns
- Glowstone
- Sea Lanterns
- Glow Berries
- Magma Blocks
- Other compatible glowing items
How It Works
OptiFine updates nearby lighting in real time. As you move, the light moves with you, making exploration faster and safer.
Advantages
Dynamic Lighting offers several benefits:
- Explore caves without stopping.
- Find resources more easily.
- Improve nighttime visibility.
- Create a more immersive experience.
- Save time while mining.
Connected Textures (CTM)
Connected Textures, often called CTM, remove visible borders between matching blocks.
Without CTM, repeated textures can look disconnected. OptiFine blends these textures to create a cleaner appearance.
Resource Pack Support
Many HD resource packs include CTM files.
Popular examples include:
- Faithful
- ModernArch
- Realistico
OptiFine automatically recognizes compatible packs.
Visual Improvements
Connected Textures improve:
- Glass panes.
- Bookshelves.
- Sandstone.
- Stone bricks.
- Decorative blocks.
- Custom textures.
Large buildings appear more polished and realistic.
HD Textures
OptiFine supports high-resolution resource packs that vanilla Minecraft cannot fully optimize.
Supported resolutions include:
- 64x
- 128x
- 256x
- 512x
Higher resolutions create sharper blocks, clearer details, and richer environments.
Keep in mind that larger texture packs require more GPU memory and processing power.
Shader Support
Shader support remains one of OptiFine’s biggest advantages.
Shaders replace Minecraft’s default lighting with advanced visual effects.
Common improvements include:
- Dynamic shadows.
- Realistic water.
- Better reflections.
- Volumetric lighting.
- Moving clouds.
- Waving plants.
- Improved skies.
Shader Engine
OptiFine includes its own shader system. You do not need a separate shader loader to run compatible shader packs.
Compatibility
Popular shader packs include:
- BSL Shaders
- Complementary Shaders
- Sildur’s Vibrant Shaders
- SEUS Renewed
- Chocapic13
- ProjectLUMA
Most shader packs work after selecting them from the Shader menu.
Performance
Shaders increase GPU usage. OptiFine provides settings that help balance image quality and FPS.
Lower-end systems can reduce shader quality for smoother gameplay.
Smart Animations
Smart Animations improve performance by rendering only animations that are currently visible.
Instead of updating every animated texture, OptiFine skips those outside your view.
Benefits include:
- Lower memory usage.
- Reduced GPU workload.
- Higher FPS.
- Smoother gameplay.
Players using many resource packs often notice significant improvements.
Fast Render
Fast Render simplifies parts of Minecraft’s rendering process to improve performance.
Benefits include:
- Higher FPS.
- Lower GPU usage.
- Faster rendering.
- Reduced lag.
Limitations
Some shader packs and advanced graphics features may not work correctly with Fast Render enabled.
If graphical glitches appear, disable Fast Render before troubleshooting other settings.
Smooth FPS
Smooth FPS focuses on frame consistency instead of raw frame numbers.
A stable 90 FPS often feels better than an unstable 120 FPS.
Frame Pacing
OptiFine reduces sudden frame spikes by distributing rendering work more evenly.
Performance Stability
Benefits include:
- Less stuttering.
- More responsive controls.
- Better camera movement.
- Improved gameplay during exploration.
Better Grass
Better Grass extends grass textures to block sides, creating smoother landscapes.
Hills, plains, and forests look more natural without changing gameplay.
Better Snow
Better Snow adds snow layers to compatible blocks during winter biomes.
The result creates a cleaner and more immersive snowy environment.
Custom Colors
Custom Colors allow resource packs to modify many color elements across Minecraft.
These include:
- Grass
- Water
- Sky
- Fog
- Leaves
- Particles
The feature gives creators greater artistic freedom.
Custom Sky
Custom Sky replaces Minecraft’s default sky with high-quality alternatives.
Many resource packs include:
- Realistic sunsets.
- Improved stars.
- Better moons.
- Animated skies.
- Enhanced cloud effects.
Emissive Textures
Emissive Textures make selected textures glow without producing actual light.
Common examples include:
- Ore textures.
- Mob eyes.
- Decorative blocks.
- Signs.
- Custom items.
This feature improves visibility while preserving Minecraft’s lighting mechanics.
Zoom Feature
The built-in Zoom feature lets players inspect distant objects instantly.
It helps you:
- Locate villages.
- Spot hostile mobs.
- Examine builds.
- Explore terrain.
- Improve PvP awareness.
Because Zoom is integrated into OptiFine, you do not need an additional mod.
Random Entities
Random Entities assign different textures to identical mobs.
For example, cows or villagers can display unique appearances instead of sharing one texture.
This small change makes Minecraft feel more varied and alive.
Custom Entity Models (CEM)
Custom Entity Models let resource packs replace default mob models with detailed versions.
Builders and content creators use CEM to create immersive fantasy, medieval, or realistic worlds.
The feature works seamlessly with compatible resource packs.
Anti-Aliasing
Anti-Aliasing smooths jagged block edges and reduces visual artifacts.
The result creates cleaner lines and a sharper image, especially at higher resolutions.
Higher Anti-Aliasing levels improve image quality but require additional GPU power.
Anisotropic Filtering
Anisotropic Filtering improves texture clarity at steep viewing angles.
Roads, floors, and distant surfaces remain sharper instead of appearing blurry.
This feature works especially well with HD resource packs and enhances overall visual quality with a modest performance impact on modern graphics cards.
These features work together to make Minecraft OptiFine 1.17 a complete graphics optimization solution. Instead of focusing only on FPS, it gives players full control over performance, visuals, shaders, textures, and rendering behavior, making it a versatile tool for almost every Minecraft Java Edition playstyle.
Minecraft OptiFine 1.17 System Requirements
Before you download Minecraft OptiFine 1.17, make sure your computer meets the basic requirements. OptiFine does not require powerful hardware, but your experience depends on your Minecraft settings, shader packs, and resource packs.
The table below lists the recommended requirements for running OptiFine for Minecraft 1.17 smoothly.
| Component | Requirement | Recommended for Best Performance |
|---|---|---|
| Operating System | Windows 10/11 (64-bit) | Latest Windows updates installed |
| macOS | macOS 10.14 Mojave or later | Latest supported macOS version |
| Linux | Modern 64-bit Linux distribution | Updated distribution with current graphics drivers |
| CPU | Dual-core processor | Quad-core Intel Core i5/Ryzen 5 or better |
| RAM | 4 GB system memory | 8 GB or more (allocate 2–4 GB to Minecraft) |
| GPU | OpenGL-compatible graphics card | NVIDIA GeForce, AMD Radeon, or Intel Iris/Xe with updated drivers |
| Java Version | Java 16 for Minecraft 1.17 | Latest Java 16 build from a trusted source |
| Storage | 500 MB free space | 2 GB or more for Minecraft, OptiFine, shader packs, and resource packs |
Operating System Compatibility
Minecraft OptiFine 1.17 supports all major desktop operating systems.
- Windows provides the simplest installation process.
- macOS supports OptiFine through Minecraft Java Edition with Java installed.
- Linux offers full compatibility for players using supported Java runtimes.
The installation steps differ slightly, but the features remain the same across all platforms.
CPU Requirements
Minecraft depends heavily on processor performance. OptiFine improves CPU efficiency by optimizing chunk loading and rendering calculations.
A modern quad-core processor delivers better results, especially when using:
- Long render distances.
- Large survival worlds.
- Heavy modpacks.
- High-resolution resource packs.
RAM Requirements
Minecraft Java Edition benefits from enough available memory, but allocating too much RAM can reduce performance.
For most players:
- 2 GB allocated to Minecraft works well for vanilla gameplay with OptiFine.
- 3–4 GB is ideal when using shaders or HD resource packs.
Monitor memory usage if you experience stuttering or slow chunk loading.
GPU Requirements
OptiFine improves graphics performance, but shader packs still rely heavily on your graphics card.
Integrated Intel graphics can run OptiFine with optimized settings. Dedicated NVIDIA and AMD GPUs provide a better experience with high render distances, HD textures, and advanced shaders.
Keep your graphics drivers updated to improve stability and reduce graphical issues.
Java Requirements
Minecraft 1.17 introduced a major requirement change by moving to Java 16.
Installing the correct Java version helps prevent common problems such as:
- Installer not opening.
- Java exceptions.
- Missing Minecraft profile.
- Launch failures.
- Exit Code 1 errors.
If Minecraft launches correctly, OptiFine usually installs without additional Java-related issues.
Storage Requirements
OptiFine itself requires very little storage. However, shader packs, resource packs, screenshots, and saved worlds can quickly increase disk usage.
Before Downloading Minecraft OptiFine 1.17
Keeping extra free space helps Minecraft create temporary files and load worlds more efficiently.
A few simple checks before downloading OptiFine 1.17 can save time and prevent installation problems. Following these best practices also helps protect your Minecraft worlds and ensures you install the correct version.
Back Up Your Minecraft Worlds
Always create a backup before installing any mod, including Minecraft OptiFine 1.17.
Your saved worlds contain hundreds of hours of progress. A backup protects that progress if something goes wrong during installation or testing.
To create a backup:
- Open the Minecraft saves folder.
- Copy your world folders.
- Paste them into another location on your computer or an external drive.
This process takes only a few minutes and provides peace of mind.
Install the Correct Java Version
OptiFine runs as a Java application. Without the correct Java installation, the installer may fail to open.
For Minecraft 1.17, install Java 16 before running the OptiFine installer.
After installing Java:
- Confirm Java is available on your system.
- Use the 64-bit version when possible.
- Restart your computer if Java was installed recently.
Verify Your Minecraft Version
Download the OptiFine version that matches your exact Minecraft version.
For example:
- Use OptiFine 1.17 with Minecraft 1.17.
- Use OptiFine 1.17.1 with Minecraft 1.17.1.
Installing the wrong version can cause startup errors, missing profiles, crashes, or compatibility issues with Forge and shader packs.
You can check your Minecraft version directly from the Minecraft Launcher before downloading OptiFine.
Download from the Official Source
Only download Minecraft OptiFine 1.17 from the official OptiFine website.
Avoid modified installers, unofficial mirrors, or bundled downloads. Third-party websites may provide outdated files, unwanted software, or altered installers.
Using the official release helps ensure you receive the latest supported version with verified updates and bug fixes.
Follow Basic Security Practices
Good security habits reduce the risk of installation problems.
Before opening the installer:
- Download only the version you need.
- Verify the file name matches the selected release.
- Keep your antivirus software enabled.
- Close Minecraft before installation.
- Update Java if your current version is outdated.
- Install graphics driver updates when available.
These simple steps improve compatibility and help you avoid many common installation issues discussed later in this guide.
How to Download Minecraft OptiFine 1.17
Downloading Minecraft OptiFine 1.17 takes only a few minutes, but choosing the correct version is important. Installing a version that matches your Minecraft Java Edition installation helps prevent crashes, missing profiles, and compatibility issues.
This section explains which version to download and how to get it safely.
Choose the Right OptiFine Version
Before downloading, check your Minecraft version in the Minecraft Launcher.
Choose the matching OptiFine release:
| Minecraft Version | Recommended OptiFine Version | Release Status |
|---|---|---|
| Minecraft 1.17 | OptiFine HD U G9 | Stable |
| Minecraft 1.17.1 | OptiFine HD U H2 | Latest Stable |
| Minecraft 1.17.1 | OptiFine HD U H1 | Stable |
| Minecraft 1.17 | Preview Builds | Testing Only |
For most players, the newest stable release offers the best balance of performance, stability, and compatibility.
Stable Version vs Preview Versions
Understanding the release types helps you choose the right download.
Stable Version
Stable releases undergo extensive testing before publication.
They offer:
- Better performance.
- Fewer crashes.
- Improved shader compatibility.
- Reliable resource pack support.
- Better Forge compatibility.
Most players should always use the latest stable version.
Preview Versions
Preview builds give players early access to new features and compatibility updates.
They are useful for:
- Testing new Minecraft updates.
- Providing bug reports.
- Checking early compatibility.
Preview releases may contain:
- Performance issues.
- Rendering bugs.
- Shader problems.
- Compatibility limitations.
Unless you need to test a specific feature, choose the stable release.
Installation Package
OptiFine downloads as a small installer package.
The installer automatically creates an OptiFine profile inside the Minecraft Launcher.
Before running the installer:
- Close Minecraft.
- Install the correct Java version.
- Launch the matching Minecraft version at least once.
These steps help the installer detect your Minecraft directory correctly.
Understanding the JAR File
The OptiFine installer uses a .jar file.
A JAR file is a standard Java archive that contains all files needed to install OptiFine.
If the file does not open:
- Confirm Java 16 is installed.
- Make sure the JAR file opens with Java.
- Reinstall Java if necessary.
Do not rename or extract the JAR file unless you know exactly what you are doing.
Official Download Steps
Follow these steps to download Minecraft OptiFine 1.17 safely.
- Visit the official OptiFine download page.
- Locate the release matching your Minecraft version.
- Select the latest stable build whenever possible.
- Download the installer (.jar file).
- Save the file to an easy-to-find location.
- Scan the file with your antivirus if desired.
- Continue with the installation process.
Downloading from the official source helps ensure you receive the latest verified release without modified files or unwanted software.
How to Install Minecraft OptiFine 1.17
Installing OptiFine 1.17 is simple once you have downloaded the correct installer. The process is similar on Windows, macOS, and Linux because Minecraft Java Edition runs on Java across all three platforms.
Before you begin, make sure:
- Minecraft Java Edition is installed.
- You have launched Minecraft 1.17 at least once.
- Java 16 is installed.
- The OptiFine JAR file is downloaded.
Install OptiFine 1.17 on Windows
Follow these steps:
- Close Minecraft and the Minecraft Launcher.
- Locate the downloaded OptiFine JAR file.
- Double-click the file to open the installer.
- If it does not open, choose Open With → Java.
- Confirm the Minecraft installation folder.
- Click Install.
- Wait for the installation to finish.
- Open the Minecraft Launcher.
- Select the new OptiFine profile.
- Click Play.
After Minecraft starts, open Options → Video Settings. If you see additional graphics options, OptiFine installed successfully.
Install OptiFine 1.17 on macOS
Installation on macOS follows the same process.
- Install Java 16 if it is not already installed.
- Download the correct OptiFine installer.
- Open the downloaded JAR file using Java.
- Confirm the Minecraft directory.
- Click Install.
- Wait for the installer to complete.
- Launch Minecraft Launcher.
- Choose the OptiFine profile.
- Start the game.
If macOS blocks the application, review your security settings before opening the installer again.
Install OptiFine 1.17 on Linux
Linux users can install OptiFine in just a few steps.
- Verify Java 16 is installed.
- Download the correct OptiFine JAR file.
- Open a terminal in the download folder if needed.
- Launch the installer with Java.
- Confirm the Minecraft installation path.
- Click Install.
- Wait for installation to finish.
- Open Minecraft Launcher.
- Select the OptiFine profile.
- Launch Minecraft.
Most Linux distributions install OptiFine without additional configuration when Java is set up correctly.
Verify the Installation
After launching Minecraft:
- Open Video Settings.
- Check for new OptiFine settings.
- Test the Zoom feature.
- Confirm shader options appear.
- Verify Dynamic Lighting settings are available.
If these features appear, Minecraft OptiFine 1.17 installed correctly.
How to Install OptiFine 1.17 with Forge
Many players use Forge to run mods alongside OptiFine 1.17. While OptiFine works well on its own, combining it with Forge lets you enjoy performance improvements and additional gameplay mods in the same installation.
Successful installation depends on using compatible versions of Minecraft, Forge, and OptiFine.
Check Forge Compatibility
Always use a Forge release that supports your exact Minecraft version.
For example:
- Minecraft 1.17 requires a compatible Forge 1.17 build.
- Minecraft 1.17.1 requires a compatible Forge 1.17.1 build.
Running mismatched versions often causes startup failures or missing mods.
Installation Order
Follow this order for the best results.
- Install Minecraft Java Edition.
- Launch Minecraft once.
- Install the correct Forge version.
- Start Forge once to create the mods folder.
- Download the matching OptiFine version.
- Copy the OptiFine JAR file into the mods folder.
- Launch the Forge profile.
- Confirm OptiFine loads with your installed mods.
Following this sequence reduces installation errors and improves compatibility.
Common Forge Issues
Some problems appear more often than others.
Common issues include:
- Minecraft crashes during startup.
- Forge cannot detect OptiFine.
- Black screen after launching.
- Shader menu missing.
- Exit Code 1.
- Version mismatch errors.
- Mod conflicts.
- Outdated Forge build.
- Unsupported preview release.
Most issues occur because the Minecraft, Forge, and OptiFine versions do not match exactly.
Best Practices
Follow these recommendations for the most stable experience.
- Use the latest stable OptiFine release.
- Match every version exactly.
- Update Java before installing.
- Avoid preview builds unless necessary.
- Test OptiFine before adding more mods.
- Add mods one at a time.
- Keep graphics drivers updated.
- Back up your Minecraft worlds before major changes.
If problems appear after installing another mod, remove recently added mods first. Many compatibility issues come from conflicts between mods rather than OptiFine itself.
With the correct versions and installation order, OptiFine 1.17 and Forge can work together smoothly, giving you better performance while supporting a wide range of Forge mods.
Using OptiFine 1.17 with Different Minecraft Launchers
Minecraft OptiFine 1.17 works with several popular launchers. Each launcher manages game profiles differently, but the goal remains the same—launch Minecraft Java Edition with the correct OptiFine version.
Always download the OptiFine version that matches your Minecraft installation before configuring any launcher.
Minecraft Launcher
The Minecraft Launcher offers the easiest way to install and use OptiFine.
After running the OptiFine installer:
- Open Minecraft Launcher.
- Select the OptiFine installation profile.
- Choose the correct Minecraft version.
- Click Play.
This method works best for players who use OptiFine without additional mods.
Best for:
- Beginners
- Vanilla gameplay
- Shader users
- HD resource packs
MultiMC
MultiMC lets you create separate Minecraft instances for different versions and mod setups.
To use OptiFine:
- Create a Minecraft 1.17 instance.
- Install the matching Java version.
- Open Edit Instance.
- Add the OptiFine JAR as a mod or compatible patch, depending on the supported workflow.
- Launch the instance.
MultiMC keeps every installation separate, making testing much easier.
Best for:
- Multiple Minecraft versions
- Testing modpacks
- Advanced users
Prism Launcher
Prism Launcher builds on the MultiMC approach while offering an updated interface and active development.
Installation follows a similar process:
- Create a Minecraft 1.17 instance.
- Install the correct Java runtime.
- Add OptiFine using the launcher’s supported method.
- Launch the instance.
Prism Launcher works well for players managing several Minecraft profiles.
Best for:
- Modded Minecraft
- Multiple game instances
- Organized profile management
CurseForge Launcher
The CurseForge Launcher focuses on modpacks.
To add OptiFine:
- Create or open a Minecraft 1.17 profile.
- Open the profile folder.
- Place the OptiFine JAR inside the mods folder if the pack supports it.
- Launch the profile.
Always check the modpack documentation before adding OptiFine. Some packs include optimization mods that may conflict with it.
Best for:
- Forge modpacks
- Large mod collections
- Community-made packs
GDLauncher
GDLauncher offers a simple interface with strong modpack support.
Setup steps:
- Create a Minecraft 1.17 instance.
- Install Forge if needed.
- Add the OptiFine JAR to the mods folder when supported.
- Launch Minecraft.
GDLauncher makes managing multiple profiles straightforward.
Best for:
- Forge users
- Custom modpacks
- Easy launcher management
ATLauncher
ATLauncher supports both official and custom Minecraft packs.
To use OptiFine:
- Create a Minecraft 1.17 instance.
- Install Forge if required.
- Copy the OptiFine JAR into the instance’s mods folder when compatible.
- Launch the game.
Always verify OptiFine compatibility with the selected modpack.
Best for:
- Custom packs
- Private servers
- Advanced mod users
SKLauncher
SKLauncher supports both official Minecraft accounts and supported alternative login methods.
To install OptiFine:
- Create a Minecraft 1.17 profile.
- Install OptiFine using the installer or supported launcher method.
- Select the OptiFine profile.
- Launch Minecraft.
Using the correct Minecraft version helps avoid startup errors.
Best for:
- Simple profile management
- Vanilla gameplay
- OptiFine-only installations
TLauncher
Many players use TLauncher because it includes built-in profile management.
If you use TLauncher:
- Select Minecraft 1.17.
- Choose the matching OptiFine version if available through the launcher.
- If needed, install the OptiFine JAR manually using the launcher’s supported process.
- Launch the OptiFine profile.
Keep TLauncher updated to improve compatibility with newer OptiFine releases.
Tip: Launcher support and OptiFine integration can change over time. Always follow the launcher’s current documentation and use versions that match your Minecraft installation.
Best OptiFine 1.17 Settings for Maximum FPS
One of the biggest advantages of Minecraft OptiFine 1.17 is the ability to customize video settings. The right configuration can dramatically improve FPS while keeping the game visually appealing.
The settings below provide a balanced starting point for most players.
| Setting | Recommended Value | Why It Helps |
|---|---|---|
| Render Distance | 8–12 Chunks | Reduces chunk rendering while keeping good visibility. |
| Simulation Distance | 6–8 Chunks | Lowers CPU usage by limiting distant game updates. |
| Graphics | Fast | Improves FPS by reducing visual effects. |
| Particles | Minimal | Lowers GPU workload during combat and exploration. |
| Clouds | Off or Fast | Removes unnecessary rendering overhead. |
| Dynamic Lights | Fast or Off | Improves performance while keeping useful lighting. |
| Mipmaps | 2–4 | Balances texture quality and GPU performance. |
| Chunk Updates | 1 | Prevents sudden FPS drops during world loading. |
| Smooth Lighting | Minimum or Off | Reduces lighting calculations for higher FPS. |
| Entity Distance | 75% | Decreases rendering load without affecting nearby gameplay. |
Additional Performance Tips
For even better performance:
- Enable Fast Render if you do not use shaders.
- Turn on Smart Animations.
- Disable unnecessary animations.
- Lower biome blend settings.
- Reduce shadow quality when using shaders.
- Keep your graphics drivers updated.
- Close unnecessary background applications.
These adjustments often provide smoother gameplay than simply lowering every graphics setting.
Best OptiFine Settings for Low-End PCs
Not every computer has powerful hardware. Fortunately, OptiFine 1.17 gives players enough control to enjoy Minecraft on entry-level systems.
The profiles below focus on stable gameplay while maintaining good image quality.
Profile 1: 2 GB RAM
This profile targets older laptops and entry-level desktop computers.
Recommended Settings
| Setting | Value |
|---|---|
| Graphics | Fast |
| Render Distance | 6 Chunks |
| Simulation Distance | 5 Chunks |
| Smooth Lighting | Off |
| Clouds | Off |
| Particles | Minimal |
| Dynamic Lights | Off |
| Mipmaps | 0–2 |
| Entity Distance | 50% |
| Smart Animations | On |
| Fast Render | On |
| Shader Packs | Not Recommended |
Expected Result
- Better FPS.
- Reduced lag spikes.
- Faster chunk loading.
- Stable gameplay for survival and multiplayer.
Profile 2: 4 GB RAM
This setup works well for many office laptops and older gaming PCs.
Recommended Settings
| Setting | Value |
|---|---|
| Graphics | Fast |
| Render Distance | 8 Chunks |
| Simulation Distance | 6 Chunks |
| Smooth Lighting | Minimum |
| Clouds | Fast |
| Particles | Decreased |
| Dynamic Lights | Fast |
| Mipmaps | 2 |
| Entity Distance | 75% |
| Smart Animations | On |
| Fast Render | On |
| Shader Packs | Lightweight shaders only |
Expected Result
- Smooth exploration.
- Better lighting quality.
- Stable frame rates.
- Good balance between visuals and performance.
Profile 3: 8 GB RAM
This profile suits most modern gaming laptops and desktop PCs.
Recommended Settings
| Setting | Value |
|---|---|
| Graphics | Fancy |
| Render Distance | 10–12 Chunks |
| Simulation Distance | 8 Chunks |
| Smooth Lighting | Maximum |
| Clouds | Fancy |
| Particles | All |
| Dynamic Lights | Fancy |
| Mipmaps | 4 |
| Entity Distance | 100% |
| Smart Animations | On |
| Fast Render | Optional |
| Shader Packs | Medium-performance shader packs |
Expected Result
- High visual quality.
- Stable FPS.
- Smooth world rendering.
- Excellent shader compatibility.
Which Profile Should You Choose?
Start with the profile that matches your system memory, then adjust settings based on your actual performance.
If FPS remains low:
- Reduce Render Distance first.
- Lower Simulation Distance next.
- Disable Dynamic Lights.
- Turn off Clouds.
- Use Fast Graphics instead of Fancy.
- Avoid high-resolution resource packs.
- Choose lightweight shader packs or disable shaders entirely.
These adjustments usually provide the biggest performance gains without significantly affecting gameplay.
OptiFine 1.17 Graphics Settings Explained
Minecraft OptiFine 1.17 gives you much more control than the default Minecraft video menu. Every setting affects image quality, FPS, or both. Understanding each option helps you find the perfect balance between performance and visuals.
Below is a detailed explanation of every important graphics option.
Graphics
This setting controls the overall visual quality.
Options
- Fast
- Fancy
Fast disables several visual effects to improve FPS.
Fancy enables better transparency, smoother leaves, and richer visual details.
Best For
- Fast: Low-end PCs
- Fancy: Mid-range and high-end systems
Render Distance
Render Distance controls how far the world loads around you.
Higher values show more terrain but require more CPU and GPU power.
Recommended
- 6–8 Chunks for low-end PCs
- 10–12 Chunks for balanced gameplay
- 16+ Chunks for high-end hardware
Simulation Distance
Simulation Distance determines how far game mechanics remain active.
It affects:
- Redstone
- Mobs
- Crops
- Animals
- Villagers
Lower values improve CPU performance.
Smooth Lighting
Smooth Lighting softens shadows between blocks.
Options
- Off
- Minimum
- Maximum
Turning it off increases FPS.
Maximum creates smoother lighting transitions.
Dynamic Lights
Dynamic Lights illuminate nearby areas while you hold light sources.
Modes
- Off
- Fast
- Fancy
Fast provides better performance.
Fancy offers smoother lighting updates.
Particles
Particles create visual effects from explosions, weather, potions, fire, and block interactions.
Options
- All
- Decreased
- Minimal
Lower particle settings improve FPS during combat and large events.
Clouds
Cloud rendering affects the sky.
Options
- Off
- Fast
- Fancy
Disabling clouds provides a small FPS increase.
Entity Distance
Entity Distance controls how far mobs and other entities remain visible.
Lower values reduce rendering load.
Higher values improve visibility during exploration.
Mipmap Levels
Mipmaps smooth textures at long viewing distances.
Typical Values
- 0
- 2
- 4
Higher values improve texture quality but use more GPU memory.
Biome Blend
Biome Blend smooths color transitions between biomes.
Lower values improve FPS.
Higher values create more natural landscapes.
Chunk Updates
Chunk Updates determine how many chunks load each frame.
Lower values reduce sudden FPS drops.
Higher values load worlds faster but increase CPU usage.
Smart Animations
Smart Animations only animate visible textures.
Benefits include:
- Lower memory usage.
- Better FPS.
- Reduced GPU workload.
This setting should remain enabled for most players.
Fast Render
Fast Render simplifies rendering calculations.
Benefits:
- Higher FPS.
- Reduced GPU load.
Limitations:
- Some shader packs may not work correctly.
- Certain graphics features may conflict with this setting.
Disable Fast Render if you experience shader issues.
Fast Math
Fast Math simplifies mathematical calculations used during rendering.
Benefits include:
- Slight FPS improvements.
- Lower CPU usage.
Visual differences remain minimal for most players.
Fog Settings
Fog controls distant world visibility.
Lower fog improves visibility and may slightly improve performance.
Many players disable fog while exploring or building.
Anti-Aliasing
Anti-Aliasing smooths jagged edges on blocks and objects.
Higher levels improve image quality but increase GPU usage.
Low-end systems should keep this setting disabled.
Anisotropic Filtering
Anisotropic Filtering sharpens textures viewed at an angle.
It works especially well with HD resource packs.
Modern graphics cards handle this feature efficiently.
Connected Textures
Connected Textures remove visible borders between matching blocks.
The feature works with compatible resource packs and improves building aesthetics.
Performance impact remains very small.
Better Grass
Better Grass extends grass textures around block sides.
Landscapes appear cleaner and more natural.
The FPS impact is minimal.
Better Snow
Better Snow places snow layers on compatible blocks.
Snowy biomes become more immersive without affecting gameplay.
Custom Colors
Custom Colors allow resource packs to change the appearance of:
- Grass
- Water
- Leaves
- Sky
- Fog
- Particles
The feature adds visual variety with almost no performance cost.
Custom Sky
Custom Sky replaces the default sky with high-quality alternatives.
Many shader and resource packs use this feature for realistic skies and sunsets.
Emissive Textures
Emissive Textures make selected textures glow without producing actual light.
Examples include:
- Mob eyes
- Ores
- Decorative blocks
The feature enhances visuals while maintaining game balance.
Natural Textures
Natural Textures rotate similar blocks automatically.
Large surfaces look less repetitive and more realistic.
Builders often enable this option.
Random Entities
Random Entities assign different textures to mobs of the same type.
Villages, farms, and forests feel more diverse.
Custom Entity Models
Custom Entity Models replace default mob models with improved versions supplied by resource packs.
Many fantasy and realistic resource packs rely on this feature.
Zoom
Zoom lets you inspect distant objects instantly.
Players use it to:
- Find villages.
- Spot mobs.
- Build accurately.
- Explore terrain.
- Improve PvP awareness.
Best Shader Packs for OptiFine 1.17
One of the biggest reasons players install Minecraft OptiFine 1.17 is shader support. Shader packs transform Minecraft’s lighting, shadows, water, and atmosphere while preserving the game’s sandbox style.
Each shader pack offers a different balance between visual quality and performance.
BSL Shaders
BSL Shaders deliver vibrant colors, realistic lighting, soft shadows, and beautiful sunsets.
Features
- Dynamic lighting
- Volumetric clouds
- Water reflections
- Bloom effects
- Atmospheric fog
FPS Impact
Medium
Best Hardware
Mid-range to high-end PCs
Pros
- Excellent image quality
- Highly customizable
- Stable performance
- Great community support
Cons
- Heavy for entry-level hardware
- Requires a dedicated GPU for the best experience
Complementary Shaders
Complementary Shaders build upon the BSL style while improving optimization.
Features
- Balanced lighting
- High compatibility
- Beautiful water
- Soft shadows
- Natural colors
FPS Impact
Low to Medium
Best Hardware
Mid-range systems
Pros
- Great performance
- Easy to configure
- Excellent default settings
Cons
- Fewer cinematic effects than heavier shader packs
SEUS Renewed
SEUS focuses on realistic lighting and cinematic visuals.
Features
- Realistic shadows
- Dynamic sunlight
- Advanced reflections
- Volumetric lighting
FPS Impact
High
Best Hardware
High-end gaming PCs
Pros
- Stunning realism
- Professional-quality visuals
- Excellent lighting
Cons
- Demanding GPU requirements
- Lower FPS on older hardware
Chocapic13 Shaders
Chocapic13 offers multiple quality presets.
Features
- Dynamic weather
- Natural lighting
- Water animation
- Performance presets
FPS Impact
Low to High
Best Hardware
Entry-level to high-end systems
Pros
- Flexible quality options
- Wide hardware support
- Good optimization
Cons
- High presets require powerful hardware
Sildur’s Vibrant Shaders
Sildur’s remains one of the most popular shader packs.
Features
- Dynamic shadows
- Bloom
- Water effects
- Vibrant colors
- Multiple editions
FPS Impact
Low to Medium
Best Hardware
Most gaming PCs
Pros
- Beginner-friendly
- Excellent optimization
- Multiple quality presets
Cons
- Some advanced effects appear less realistic than SEUS
Continuum Shaders
Continuum emphasizes realism above everything else.
Features
- Physically based lighting
- Ultra-realistic skies
- Advanced reflections
- High-quality shadows
FPS Impact
Very High
Best Hardware
High-end GPUs
Pros
- Outstanding realism
- Premium visual quality
- Ideal for screenshots
Cons
- Extremely demanding
- Not suitable for low-end systems
Oceano Shaders
Oceano creates colorful and immersive environments.
Features
- Bright oceans
- Dynamic skies
- Realistic water
- Enhanced weather
FPS Impact
Medium
Best Hardware
Mid-range gaming PCs
Pros
- Beautiful water rendering
- Vibrant atmosphere
- Easy setup
Cons
- Slightly heavier than lightweight shader packs
ProjectLUMA
ProjectLUMA focuses on balanced realism and performance.
Features
- Clean lighting
- Soft shadows
- Improved reflections
- Stable performance
FPS Impact
Medium
Best Hardware
Mid-range to high-end PCs
Pros
- Smooth gameplay
- Excellent lighting
- Good optimization
Cons
- Smaller community than BSL or Complementary
Which Shader Pack Should You Choose?
| Shader Pack | Performance | Visual Quality | Best For |
|---|---|---|---|
| Complementary | ⭐⭐⭐⭐⭐ | ⭐⭐⭐⭐☆ | Balanced gameplay |
| Sildur’s Vibrant | ⭐⭐⭐⭐⭐ | ⭐⭐⭐⭐☆ | Most players |
| BSL | ⭐⭐⭐⭐☆ | ⭐⭐⭐⭐⭐ | Realistic visuals |
| Chocapic13 | ⭐⭐⭐⭐☆ | ⭐⭐⭐⭐☆ | Flexible performance |
| Oceano | ⭐⭐⭐⭐☆ | ⭐⭐⭐⭐☆ | Colorful worlds |
| ProjectLUMA | ⭐⭐⭐⭐☆ | ⭐⭐⭐⭐☆ | Balanced realism |
| SEUS Renewed | ⭐⭐⭐☆☆ | ⭐⭐⭐⭐⭐ | Cinematic graphics |
| Continuum | ⭐⭐☆☆☆ | ⭐⭐⭐⭐⭐ | High-end hardware |
How to Install Shaders in OptiFine 1.17
Installing shader packs in Minecraft OptiFine 1.17 is straightforward. Once OptiFine is installed, you only need to place the shader pack in the correct folder and enable it from the game menu.
Step 1: Download a Shader Pack
Choose a shader pack that matches your hardware and supports Minecraft 1.17.
Always download shader packs from the developer’s official website or a trusted Minecraft community source. This helps ensure you receive the latest version without modified files.
Keep the downloaded file in ZIP format. Do not extract it unless the shader developer specifically instructs you to do so.
Step 2: Locate the Shaderpacks Folder
Launch Minecraft with the OptiFine profile.
Navigate to:
Options → Video Settings → Shaders → Shaders Folder
Minecraft automatically opens the shaderpacks directory.
If the folder does not exist, OptiFine creates it the first time you open the Shader menu.
Step 3: Copy the Shader Pack
Move the downloaded ZIP file into the shaderpacks folder.
Do not rename the file unless the developer recommends it.
You can store multiple shader packs in this folder and switch between them whenever you like.
Step 4: Activate the Shader Pack
Return to the Shader menu.
OptiFine scans the folder and displays every compatible shader pack.
Select the shader pack you want to use.
Wait a few seconds while Minecraft reloads the rendering engine.
Once the reload finishes, the new lighting, shadows, and visual effects appear automatically.
Step 5: Optimize Shader Performance
Shaders increase GPU workload, so adjusting a few settings can improve FPS.
For smoother gameplay:
- Reduce Render Distance.
- Lower Shadow Quality if available.
- Use Fast Dynamic Lights.
- Disable unnecessary animations.
- Close background applications.
- Allocate enough RAM to Minecraft.
These changes often improve performance without noticeably reducing image quality.
Troubleshooting Shader Problems
If shaders do not work correctly, check the following before reinstalling.
Shader Pack Does Not Appear
Possible causes:
- File extracted by mistake.
- Wrong folder location.
- Unsupported shader version.
Solution:
- Keep the shader as a ZIP file.
- Place it inside the shaderpacks folder.
- Restart Minecraft if necessary.
Black Screen After Enabling Shaders
Possible causes:
- Outdated graphics drivers.
- Unsupported graphics card.
- Shader conflict.
Solution:
- Update GPU drivers.
- Test another shader pack.
- Reset OptiFine video settings.
Low FPS with Shaders
Possible causes:
- High Render Distance.
- Heavy shader preset.
- Limited GPU performance.
Solution:
- Lower Render Distance.
- Choose a lighter shader preset.
- Disable unnecessary visual effects.
- Close background programs.
Minecraft Crashes When Loading Shaders
Possible causes:
- Incorrect OptiFine version.
- Unsupported shader pack.
- Version mismatch.
Solution:
- Verify your Minecraft and OptiFine versions match.
- Download a shader pack that supports Minecraft 1.17.
- Remove incompatible shader packs before testing another one.
Following these steps ensures a smoother shader installation and helps you enjoy the enhanced lighting, realistic water, dynamic shadows, and immersive visuals that make OptiFine 1.17 one of the best graphics optimization tools for Minecraft Java Edition.
Best Resource Packs for OptiFine 1.17
One of the biggest advantages of Minecraft OptiFine 1.17 is its excellent support for HD resource packs. OptiFine unlocks advanced features like Connected Textures (CTM), Custom Entity Models (CEM), Random Entities, Emissive Textures, Custom Colors, and HD fonts, allowing resource packs to look and perform much better than they do in vanilla Minecraft.
Below are some of the best resource packs for Minecraft 1.17 OptiFine.
Faithful
Faithful keeps Minecraft’s original style while increasing texture resolution.
Features
- 32x resolution
- Vanilla-friendly design
- HD textures
- Connected Textures support
- Wide community support
Performance
⭐ FPS Impact: Very Low
Best For
- Survival players
- Multiplayer servers
- Vanilla enthusiasts
Pros
- Familiar Minecraft appearance
- Lightweight
- Excellent compatibility
- Great performance
Cons
- Less dramatic visual improvement than realistic packs
Bare Bones
Bare Bones recreates Minecraft’s official promotional artwork.
Features
- Minimalist textures
- Bright colors
- Smooth blocks
- Simple interface
Performance
⭐ FPS Impact: Very Low
Best For
- Low-end PCs
- Casual gameplay
- Creative builds
Pros
- Extremely lightweight
- Clean appearance
- Excellent FPS
Cons
- Limited texture detail
ModernArch
ModernArch delivers one of Minecraft’s most realistic visual experiences.
Features
- Ultra HD textures
- Physically Based Rendering (PBR)
- Detailed materials
- High-resolution surfaces
Performance
⭐ FPS Impact: Very High
Best Hardware
- RTX GPUs
- High-end AMD graphics cards
Pros
- Incredible realism
- Premium-quality textures
- Excellent with shaders
Cons
- Demanding hardware requirements
- Large download size
Realistico
Realistico transforms Minecraft into a realistic world without changing gameplay.
Features
- High-resolution textures
- Natural materials
- Improved lighting support
- Excellent shader compatibility
Performance
⭐ FPS Impact: Medium to High
Best Hardware
Mid-range and high-end gaming PCs
Pros
- Beautiful environment
- Realistic building materials
- Strong OptiFine integration
Cons
- Higher VRAM usage
X-Ray Resource Pack
X-Ray resource packs make valuable ores easier to locate by changing block visibility.
Features
- Ore highlighting
- Simplified underground visibility
Performance
⭐ FPS Impact: Very Low
Best For
- Single-player testing
- Creative worlds
Pros
- Easy resource identification
- Lightweight
Cons
- Not allowed on most multiplayer servers
- Can result in server penalties if used where prohibited
PvP Resource Packs
PvP packs focus on competitive gameplay instead of realism.
Features
- Short swords
- Clear particles
- Simplified textures
- FPS-friendly design
Performance
⭐ FPS Impact: Low
Best For
- PvP servers
- BedWars
- SkyWars
- Practice servers
Pros
- High FPS
- Better combat visibility
- Lightweight
Cons
- Limited visual detail
Medieval Resource Packs
Medieval packs completely transform Minecraft into a fantasy world.
Features
- Castle textures
- Medieval buildings
- Fantasy items
- Custom entity models
- Rich environmental details
Performance
⭐ FPS Impact: Medium
Best For
- RPG worlds
- Adventure maps
- Medieval builds
Pros
- Highly immersive
- Excellent building experience
- Great with shaders
Cons
- Larger file sizes
- Higher memory usage
Comparison Table
| Resource Pack | Resolution | FPS Impact | Best For |
|---|---|---|---|
| Faithful | 32x | ⭐⭐⭐⭐⭐ | Vanilla gameplay |
| Bare Bones | 16x | ⭐⭐⭐⭐⭐ | Low-end PCs |
| ModernArch | 128x–1024x | ⭐⭐☆☆☆ | Ultra realism |
| Realistico | 128x+ | ⭐⭐⭐☆☆ | Realistic survival |
| X-Ray | 16x | ⭐⭐⭐⭐⭐ | Single-player testing |
| PvP Packs | 16x–32x | ⭐⭐⭐⭐⭐ | Competitive gameplay |
| Medieval Packs | 32x–128x | ⭐⭐⭐⭐☆ | Fantasy builds |
Which Resource Pack Should You Choose?
Your choice depends on your goals and hardware.
- Faithful offers the best all-around experience.
- Bare Bones is ideal for maximum FPS.
- ModernArch delivers the highest visual quality.
- Realistico balances realism and performance.
- PvP Packs improve competitive gameplay.
- Medieval Packs create immersive fantasy worlds.
- X-Ray packs should only be used where permitted and in accordance with server rules.
How to Install Resource Packs in OptiFine 1.17
Installing a resource pack in Minecraft OptiFine 1.17 is quick and simple. OptiFine automatically detects compatible packs and enables advanced features such as Connected Textures, Emissive Textures, and Custom Entity Models.
Step 1: Download a Compatible Resource Pack
Download a resource pack that supports Minecraft 1.17.
For the best compatibility:
- Choose trusted creators.
- Match the Minecraft version.
- Keep the file in ZIP format.
- Do not extract the archive unless instructed.
Step 2: Open the Resource Packs Folder
Launch Minecraft using the OptiFine profile.
Go to:
Options → Resource Packs → Open Pack Folder
Minecraft opens the resourcepacks folder automatically.
Step 3: Copy the Resource Pack
Move the downloaded ZIP file into the resourcepacks folder.
You can store multiple packs in this folder.
Step 4: Enable the Resource Pack
Return to Minecraft.
The new resource pack appears in the available list.
- Click the resource pack.
- Move it to the selected column.
- Click Done.
- Wait for Minecraft to reload textures.
The new textures load immediately.
Step 5: Arrange Pack Priority
When using multiple packs:
- Place the highest-priority pack at the top.
- Leave compatibility packs below it.
- Reload resources after changing the order.
Proper pack order prevents missing textures and visual conflicts.
Troubleshooting
If the pack does not appear:
- Confirm it supports Minecraft 1.17.
- Keep the ZIP file intact.
- Verify the file is inside the resourcepacks folder.
- Restart Minecraft if necessary.
If textures appear broken:
- Disable conflicting packs.
- Update OptiFine.
- Download the latest version of the resource pack.
OptiFine 1.17 Performance Benchmarks
The exact FPS improvement depends on your CPU, GPU, RAM, render distance, shader settings, and world complexity. However, OptiFine 1.17 consistently improves performance over vanilla Minecraft by optimizing rendering, chunk loading, and graphics settings.
The benchmark figures below represent typical results using optimized OptiFine settings. Actual performance will vary by hardware and game configuration.
Vanilla Minecraft vs OptiFine
| Metric | Vanilla Minecraft | OptiFine 1.17 |
|---|---|---|
| Average FPS | Baseline | Typically 20–60% higher* |
| Frame Time Stability | Moderate | More consistent |
| Chunk Loading | Standard | Faster |
| Graphics Customization | Limited | Extensive |
| Shader Support | No | Yes |
| HD Resource Pack Support | Basic | Full |
*Results vary depending on hardware, render distance, shaders, and installed resource packs.
Low-End PC Benchmark
Example Hardware
- Intel Core i3 / AMD Ryzen 3
- Intel UHD Graphics or similar
- 8 GB RAM
| Scenario | Vanilla FPS | OptiFine FPS |
|---|---|---|
| Default Settings | 40–60 | 60–90 |
| Optimized Settings | 50–70 | 80–120 |
| Lightweight Shaders | Not Supported | 35–55 |
Mid-Range PC Benchmark
Example Hardware
- Intel Core i5 / Ryzen 5
- NVIDIA GTX 1660 / RTX 3050 or AMD equivalent
- 16 GB RAM
| Scenario | Vanilla FPS | OptiFine FPS |
|---|---|---|
| Default Settings | 90–140 | 130–190 |
| Optimized Settings | 110–160 | 170–240 |
| BSL / Complementary Shaders | Not Supported | 70–120 |
High-End PC Benchmark
Example Hardware
- Intel Core i7/i9 or Ryzen 7/9
- RTX 4070-class GPU or better
- 32 GB RAM
| Scenario | Vanilla FPS | OptiFine FPS |
|---|---|---|
| Default Settings | 180–280 | 240–380 |
| Optimized Settings | 220–320 | 300–450+ |
| High-End Shaders (SEUS, Continuum) | Not Supported | 90–180 |
Frame Time Comparison
Frame time is just as important as FPS. Lower and more consistent frame times make Minecraft feel smoother, especially during exploration, combat, and Elytra flight.
| Feature | Vanilla | OptiFine 1.17 |
|---|---|---|
| Frame Time Consistency | Good | Better |
| Chunk Loading Stutter | More noticeable | Reduced |
| Camera Smoothness | Standard | Improved |
| World Streaming | Standard | Faster |
| Shader Optimization | Not Available | Supported |
Benchmark Summary
Across most systems, Minecraft OptiFine 1.17 delivers:
- Higher average FPS.
- More stable frame times.
- Faster chunk loading.
- Better GPU utilization.
- Improved CPU efficiency.
- Full shader support.
- Better performance with HD resource packs.
- Smoother overall gameplay.
While the exact gains depend on your hardware and settings, OptiFine remains one of the most effective performance and graphics optimization tools available for Minecraft Java Edition 1.17 and Minecraft OptiFine 1.15.
Java Requirements for OptiFine 1.17
Java is the foundation of Minecraft Java Edition. Using the correct Java version ensures Minecraft OptiFine 1.17 installs properly, launches without errors, and delivers the best performance.
Why Java Matters
OptiFine is distributed as a JAR file. The installer runs through Java, and Minecraft itself depends on the Java Runtime Environment (JRE).
Using the wrong Java version can cause:
- Installer not opening
- Launch failures
- Exit Code 1
- Missing OptiFine profile
- Game crashes
- Poor performance
Installing the correct version avoids most of these problems.
Java 16 (Recommended for Minecraft 1.17)
Java 16 is the official Java version for Minecraft 1.17.
Mojang migrated Minecraft Java Edition to Java 16 with the Caves & Cliffs Part I update. Because of this change, OptiFine 1.17 is designed to work with Java 16.
Benefits
- Official Minecraft 1.17 support
- Better compatibility
- Stable performance
- Fewer installation issues
- Improved security compared to older Java versions
If you play only Minecraft 1.17, Java 16 remains the safest choice.
Java 17
Java 17 became the standard starting with later Minecraft versions.
Although some systems can run Minecraft 1.17 with Java 17, compatibility depends on your launcher and installed mods.
When to Use Java 17
Use Java 17 if:
- Your launcher supports it.
- You play multiple Minecraft versions.
- You understand version management.
Otherwise, Java 16 remains the recommended option for OptiFine 1.17.
OpenJDK
OpenJDK is the open-source implementation of Java.
Many Linux distributions install OpenJDK by default.
Advantages
- Free
- Frequently updated
- Reliable
- Excellent Linux support
- Compatible with Minecraft Java Edition
Most players experience no difference between OpenJDK and Oracle Java.
Oracle Java
Oracle Java is Oracle’s official Java distribution.
Advantages
- Stable releases
- Official support
- Broad compatibility
- Simple installation on Windows and macOS
Both Oracle Java and OpenJDK work well with OptiFine 1.17.
Why 64-Bit Java Matters
Always install the 64-bit version of Java when using a 64-bit operating system.
Benefits include:
- Better memory management
- Improved stability
- Support for larger RAM allocation
- Better shader performance
- Improved resource pack compatibility
A 32-bit Java installation limits available memory and can reduce performance.
How to Update Java
Keeping Java updated improves security and compatibility.
Follow these steps:
- Download the latest supported Java version.
- Close Minecraft and the launcher.
- Install the update.
- Restart your computer.
- Launch Minecraft.
- Verify the launcher detects the updated Java installation.
If problems appear after updating, verify the launcher is using the intended Java runtime.
OptiFine 1.17 Compatibility Guide
Minecraft OptiFine 1.17 supports a wide range of operating systems, hardware, and software. Matching compatible versions helps prevent crashes and installation errors.
Software Compatibility
| Software | Compatibility | Notes |
|---|---|---|
| Minecraft Java Edition 1.17 | ✅ Full | Officially supported |
| Forge (matching 1.17/1.17.1 builds) | ✅ Yes | Use compatible versions only |
| Fabric | ⚠️ Limited | Requires OptiFabric where supported; compatibility varies by version |
| Vanilla Minecraft | ✅ Yes | Full support |
| Shader Packs | ✅ Yes | Broad support through OptiFine |
| HD Resource Packs | ✅ Yes | Full support |
Operating System Compatibility
| Platform | Support | Notes |
|---|---|---|
| Windows | ✅ Full | Recommended for most users |
| macOS | ✅ Full | Requires compatible Java installation |
| Linux | ✅ Full | Works well with OpenJDK or Oracle Java |
Graphics Card Compatibility
| GPU | Compatibility | Performance |
|---|---|---|
| NVIDIA GeForce | ✅ Excellent | Best shader performance |
| AMD Radeon | ✅ Excellent | Strong OpenGL performance |
| Intel UHD / Iris / Xe | ✅ Good | Best with optimized settings |
CPU Compatibility
OptiFine performs well on:
- Intel Core processors
- AMD Ryzen processors
- Apple Silicon through compatible Java and launcher configurations
Faster CPUs improve chunk loading and world generation.
Memory Compatibility
Recommended allocation:
| System RAM | Minecraft Allocation |
|---|---|
| 4 GB | 2 GB |
| 8 GB | 2–4 GB |
| 16 GB | 4 GB |
| 32 GB+ | 4–6 GB (depending on mods and resource packs) |
Allocating excessive RAM can increase garbage collection pauses, so more is not always better.
Common OptiFine 1.17 Errors and Fixes
Most OptiFine problems result from incorrect Java versions, mismatched Minecraft versions, outdated drivers, or incompatible mods. The sections below explain how to identify and fix the most common issues.
OptiFine Won’t Install
Symptoms
- Installer does not open.
- Nothing happens after double-clicking.
- Installation never starts.
Causes
- Java missing.
- Wrong Java version.
- Damaged JAR file.
- Minecraft not launched before installation.
Step-by-Step Fix
- Install Java 16.
- Launch Minecraft 1.17 once.
- Download a fresh OptiFine installer.
- Open the JAR file with Java.
- Run the installer again.
Prevention
- Keep Java updated.
- Download OptiFine from the official website.
- Match the Minecraft version exactly.
Black Screen
Symptoms
- Black display after launching.
- Audio plays but no graphics.
- Frozen loading screen.
Causes
- Shader conflicts.
- Graphics driver issues.
- Incorrect video settings.
- Unsupported GPU configuration.
Step-by-Step Fix
- Disable shaders.
- Reset OptiFine video settings.
- Update GPU drivers.
- Restart Minecraft.
- Test without resource packs.
Prevention
- Use shader packs compatible with Minecraft 1.17.
- Keep graphics drivers updated.
- Avoid unsupported graphics settings.
Exit Code 1
Symptoms
- Minecraft closes immediately.
- Launcher displays Exit Code 1.
Causes
- Wrong Java version.
- Incorrect JVM arguments.
- Mod conflicts.
- Version mismatch.
Step-by-Step Fix
- Verify Java 16 is installed.
- Remove incompatible mods.
- Reinstall OptiFine.
- Check the selected Minecraft version.
- Launch with a clean profile.
Prevention
- Match OptiFine to your Minecraft version.
- Avoid mixing incompatible mods.
- Keep Java up to date.
Exit Code 0
Symptoms
- Minecraft closes unexpectedly.
- No detailed error message.
Causes
- Driver issues.
- Corrupted configuration files.
- Resource pack or shader conflicts.
Step-by-Step Fix
- Update graphics drivers.
- Remove recently added mods.
- Disable shaders.
- Reset OptiFine settings.
- Restart the launcher.
Prevention
- Test new mods one at a time.
- Keep your game and drivers current.
Missing Java
Symptoms
- JAR file will not open.
- “Java not found” message.
- Installer cannot start.
Causes
- Java not installed.
- Incorrect Java path.
- Corrupted installation.
Step-by-Step Fix
- Install Java 16 (64-bit).
- Restart your computer.
- Associate JAR files with Java if needed.
- Launch the installer again.
Prevention
- Verify Java after installation.
- Keep Java updated.
Minecraft Crashes
Symptoms
- Crash during startup.
- Crash while loading a world.
- Random crashes during gameplay.
Causes
- Incompatible mods.
- Incorrect OptiFine version.
- Outdated drivers.
- Insufficient RAM.
Step-by-Step Fix
- Remove conflicting mods.
- Install the correct OptiFine version.
- Update GPU drivers.
- Allocate an appropriate amount of RAM.
- Test with a clean profile.
Prevention
- Install mods gradually.
- Keep software updated.
- Back up your worlds regularly.
Low FPS
Symptoms
- Poor performance.
- Stuttering.
- Lag spikes.
Causes
- High render distance.
- Heavy shaders.
- High-resolution resource packs.
- Background applications.
Step-by-Step Fix
- Lower Render Distance.
- Reduce Simulation Distance.
- Enable Smart Animations.
- Use Fast Graphics.
- Disable heavy shaders if necessary.
Prevention
- Match graphics settings to your hardware.
- Close unnecessary background programs.
- Keep graphics drivers updated.
Corrupted JAR File
Symptoms
- Installer fails to launch.
- Archive errors.
- Installation stops unexpectedly.
Causes
- Incomplete download.
- File corruption.
- Modified installer.
Step-by-Step Fix
- Delete the damaged file.
- Download a new installer from the official source.
- Verify the download completed successfully.
- Run the installer again.
Prevention
- Avoid unofficial mirrors.
- Ensure downloads finish completely.
Forge Crash
Symptoms
- Crash during startup.
- Mods fail to load.
- Forge reports compatibility errors.
Causes
- Unsupported Forge build.
- Version mismatch.
- Mod conflicts.
Step-by-Step Fix
- Match Forge to Minecraft 1.17 or 1.17.1.
- Update OptiFine to the correct version.
- Remove conflicting mods.
- Test Forge without additional mods.
- Reintroduce mods one at a time.
Prevention
- Use stable Forge builds.
- Verify version compatibility before installing mods.
Shader Crash
Symptoms
- Crash after enabling shaders.
- Severe graphical glitches.
- World fails to load.
Causes
- Unsupported shader pack.
- Outdated GPU drivers.
- Insufficient graphics memory.
Step-by-Step Fix
- Disable the shader pack.
- Update graphics drivers.
- Test another shader.
- Lower shader quality settings.
- Restart Minecraft.
Prevention
- Choose shaders suited to your hardware.
- Keep drivers current.
- Avoid using experimental shader versions.
OptiFine Profile Missing
Symptoms
- No OptiFine profile in the Minecraft Launcher.
- Installer reports success but the profile is absent.
Causes
- Minecraft not launched before installation.
- Installation to the wrong directory.
- Incorrect launcher configuration.
Step-by-Step Fix
- Launch Minecraft 1.17 once.
- Reinstall OptiFine.
- Confirm the Minecraft directory.
- Restart the launcher.
- Create a new installation profile if needed.
Prevention
- Always launch the target Minecraft version before installing OptiFine.
- Verify the installation path.
Resource Pack Issues
Symptoms
- Missing textures.
- Pink and black blocks.
- Resource pack fails to load.
- Visual glitches.
Causes
- Unsupported pack version.
- Incorrect pack order.
- Corrupted download.
- Missing OptiFine features required by the pack.
Step-by-Step Fix
- Verify the resource pack supports Minecraft 1.17.
- Place the ZIP file in the resourcepacks folder.
- Adjust the resource pack priority.
- Disable conflicting packs.
- Download a fresh copy if corruption is suspected.
Prevention
- Use resource packs built for your Minecraft version.
- Avoid mixing incompatible packs.
- Keep OptiFine updated to the latest stable release for your version.
By following these troubleshooting steps and maintaining matching versions of Minecraft, OptiFine, Java, and Forge, you can avoid most installation and performance issues while enjoying a stable Minecraft OptiFine 1.17 experience.
OptiFine vs Sodium
Both OptiFine and Sodium improve the performance of Minecraft Java Edition, but they take different approaches. OptiFine is an all-in-one optimization and graphics enhancement mod, while Sodium focuses primarily on maximizing FPS through rendering optimizations.
If you want advanced graphics features, shader support, and HD resource pack compatibility in one package, OptiFine 1.17 is the better choice. If your only goal is the highest possible FPS on a Fabric-based setup, Sodium is often the stronger option.
Comparison Table
| Feature | OptiFine 1.17 | Sodium |
|---|---|---|
| FPS Improvement | Excellent | Outstanding |
| Graphics Optimization | ✅ Advanced | ✅ Performance-focused |
| Built-in Shader Support | ✅ Yes | ❌ No (requires Iris) |
| HD Resource Packs | ✅ Full support | ⚠️ Limited without additional mods |
| Connected Textures (CTM) | ✅ Yes | ❌ Requires extra mods |
| Dynamic Lighting | ✅ Yes | ❌ Requires extra mods |
| Zoom Feature | ✅ Built-in | ❌ Requires extra mod |
| Custom Entity Models (CEM) | ✅ Yes | ❌ Requires extra mods |
| Emissive Textures | ✅ Yes | ⚠️ Limited with additional mods |
| Ease of Installation | Very Easy | Easy |
| Forge Compatibility | ✅ Yes | ❌ Fabric only |
| Fabric Compatibility | ⚠️ Via OptiFabric (where supported) | ✅ Native |
| Customization Options | Extensive | Moderate |
| Best For | Graphics, shaders, and all-in-one optimization | Maximum FPS on Fabric |
FPS Performance
Sodium is designed to maximize rendering performance.
In many situations, it produces higher FPS than OptiFine because it focuses entirely on rendering optimization instead of graphics enhancements.
OptiFine still delivers significant FPS improvements while adding many visual features that Sodium does not include by default.
Features
OptiFine includes dozens of built-in features, such as:
- Dynamic Lighting
- Connected Textures
- HD Textures
- Zoom
- Better Grass
- Better Snow
- Random Entities
- Custom Entity Models
- Emissive Textures
- Anti-Aliasing
- Anisotropic Filtering
Sodium focuses mainly on rendering efficiency. Similar features often require additional Fabric mods.
Shader Support
OptiFine includes its own shader engine.
Players can install compatible shader packs immediately after installing OptiFine.
Sodium requires Iris Shaders to provide shader support.
Resource Pack Support
OptiFine fully supports advanced resource pack features, including:
- Connected Textures
- Emissive Textures
- Random Entities
- HD Fonts
- Custom Colors
Sodium requires additional mods to achieve similar functionality.
Ease of Use
OptiFine offers a simple installation process and integrates all major features into one mod.
Sodium often requires multiple companion mods depending on the features you want.
Mod Compatibility
OptiFine works well with many Forge-based setups when compatible versions are used.
Sodium integrates naturally with the Fabric ecosystem.
Choose the option that matches the mod loader you already use.
Best Use Cases
Choose OptiFine if you want:
- Built-in shader support
- HD resource packs
- Better graphics
- Advanced video settings
- An all-in-one solution
Choose Sodium if you want:
- Maximum FPS
- Fabric modpacks
- Lightweight optimization
- Minimal graphics enhancements
OptiFine vs Iris
Many players compare OptiFine and Iris because both support Minecraft shaders. However, their goals differ.
OptiFine combines performance optimization, graphics enhancements, and shader support in one package.
Iris focuses almost entirely on modern shader compatibility while relying on Sodium for rendering optimization.
Comparison Table
| Feature | OptiFine | Iris |
|---|---|---|
| Shader Support | ✅ Built-in | ✅ Built-in |
| Performance | Excellent | Excellent (especially with Sodium) |
| FPS | High | Very High with Sodium |
| Installation | Single installer | Requires Fabric and compatible mods |
| Graphics Features | Extensive | Shader-focused |
| HD Resource Packs | Full support | Requires additional mods for some advanced features |
| Forge Support | ✅ Yes | ❌ No |
| Fabric Support | ⚠️ Via OptiFabric (where supported) | ✅ Native |
| Ease of Setup | Very Easy | Moderate |
| Best For | All-in-one graphics enhancement | Fabric shader users |
Shader Support
Both solutions support popular shader packs such as:
- BSL
- Complementary
- SEUS
- Chocapic13
- Sildur’s Vibrant
- ProjectLUMA
OptiFine provides shader support out of the box.
Iris delivers excellent shader compatibility when used with the Fabric ecosystem.
Performance
Iris paired with Sodium often produces higher FPS because Sodium specializes in rendering optimization.
OptiFine offers excellent performance while including many additional graphics features that Iris does not provide directly.
Installation
OptiFine installation is straightforward:
- Download the installer.
- Run the JAR file.
- Launch the OptiFine profile.
Iris requires additional setup with the Fabric mod loader and compatible optimization mods.
Compatibility
OptiFine works well for players who prefer vanilla-style installations or Forge.
Iris is an excellent choice for players committed to the Fabric mod ecosystem.
OptiFine vs Vanilla Minecraft
Vanilla Minecraft provides the standard Minecraft Java Edition experience.
Minecraft OptiFine 1.17 builds on that foundation by improving performance, adding graphics customization, and supporting advanced visual features.
Comparison Table
| Feature | Vanilla Minecraft | OptiFine 1.17 |
|---|---|---|
| FPS | Standard | Higher |
| Graphics Settings | Basic | Extensive |
| Shader Support | ❌ No | ✅ Yes |
| HD Resource Packs | Limited | Full support |
| Connected Textures | ❌ No | ✅ Yes |
| Dynamic Lighting | ❌ No | ✅ Yes |
| Zoom Feature | ❌ No | ✅ Built-in |
| Advanced Video Settings | Limited | Comprehensive |
| Customization | Basic | Extensive |
FPS
Vanilla Minecraft performs well on many systems, but it offers limited control over rendering behavior.
OptiFine improves FPS by optimizing:
- Chunk rendering
- Graphics processing
- Animation handling
- Memory usage
- OpenGL rendering
Players often notice smoother gameplay and fewer lag spikes, especially in large worlds.
Graphics
Vanilla Minecraft includes only essential graphics settings.
OptiFine adds dozens of advanced options, including:
- Dynamic Lights
- Better Grass
- Better Snow
- Smart Animations
- Fast Render
- Fast Math
- Anti-Aliasing
- Anisotropic Filtering
- Connected Textures
- Custom Colors
These settings let players balance image quality and performance according to their hardware.
Visual Quality
OptiFine significantly enhances Minecraft’s appearance.
With shaders and HD resource packs enabled, players can enjoy:
- Realistic lighting
- Dynamic shadows
- High-resolution textures
- Water reflections
- Improved skies
- Enhanced weather effects
- Better environmental detail
Vanilla Minecraft cannot provide these enhancements without additional mods.
Resource Packs
Vanilla Minecraft supports basic resource packs.
OptiFine expands compatibility with advanced features such as:
- Connected Textures (CTM)
- Emissive Textures
- Random Entities
- Custom Entity Models
- HD Fonts
- Custom Colors
These features allow resource packs to deliver much richer visuals.
Advanced Settings
One of OptiFine’s greatest strengths is the level of control it gives players.
Advanced settings include:
- Render Distance
- Simulation Distance
- Entity Distance
- Fog Control
- Mipmap Levels
- Chunk Updates
- Smart Animations
- Fast Render
- Dynamic Lighting
- Performance optimizations
- Quality settings
- Animation controls
Vanilla Minecraft keeps these options simple, while OptiFine gives players the flexibility to optimize the game for almost any hardware configuration.
Which One Should You Choose?
Choose Vanilla Minecraft if you:
- Prefer the default game experience.
- Do not need shaders or advanced graphics.
- Want the simplest possible setup.
Choose Minecraft OptiFine 1.17 if you:
- Want higher FPS.
- Use shader packs.
- Play with HD resource packs.
- Need advanced graphics settings.
- Want better visual quality without changing Minecraft’s core gameplay.
For most Minecraft Java Edition 1.17 players, OptiFine provides a clear advantage by combining performance improvements, visual enhancements, and extensive customization in a single, easy-to-install package.
Is OptiFine 1.17 Safe?
Many players ask, “Is Minecraft OptiFine 1.17 safe?” before installing the mod. The answer depends on where you download it, how you install it, and whether you use trusted files.
When downloaded from the official source and installed correctly, OptiFine 1.17 is considered safe for Minecraft Java Edition players. It has been used by millions of players for years to improve performance, graphics, and shader support.
Download OptiFine From the Official Source
The safest way to get OptiFine 1.17 is through the official OptiFine website.
Avoid downloading OptiFine from:
- Random file-sharing websites.
- Repacked installers.
- Third-party download managers.
- Websites offering “mod bundles.”
Unofficial downloads may contain modified files, outdated versions, or unwanted software.
Always verify that the downloaded file matches the official OptiFine release name and version.
Is OptiFine Safe From Malware?
A common misconception is that Minecraft mods are automatically dangerous. The mod itself is not the problem. The risk usually comes from unsafe download sources.
The official OptiFine installer:
- Does not require suspicious programs.
- Does not need additional installers.
- Only modifies Minecraft files.
- Does not change your operating system.
Security problems usually occur when users download fake installers from unofficial websites.
Verify the OptiFine File
Before opening the installer, follow basic verification steps.
Check:
- The file extension is .jar.
- The version matches Minecraft 1.17 or 1.17.1.
- The file size looks reasonable.
- The download came from a trusted source.
You can also scan the file with your antivirus software before running it.
Safe Installation Practices
Follow these steps for a secure installation:
- Back up your Minecraft worlds.
- Install the correct Java version.
- Download the matching OptiFine release.
- Use the official installer.
- Avoid bundled software.
- Keep Minecraft and Java updated.
- Test OptiFine before adding other mods.
These practices reduce installation problems and protect your Minecraft data.
EEAT Trust Considerations
A reliable OptiFine guide should focus on:
- Accurate version compatibility.
- Safe installation methods.
- Clear troubleshooting steps.
- Avoiding unofficial downloads.
- Explaining limitations honestly.
OptiFine remains one of the most established Minecraft optimization tools because of its long development history, large community usage, and consistent updates across Minecraft versions.
Frequently Asked Questions About Minecraft OptiFine 1.17
How do I install OptiFine 1.17?
Download the OptiFine 1.17 JAR file, open it with Java, click Install, then launch Minecraft using the OptiFine profile.
Is OptiFine available for Minecraft 1.17?
Yes. OptiFine supports both Minecraft 1.17 and 1.17.1 with compatible releases.
Is OptiFine 1.17 free?
Yes. OptiFine is completely free to download and use.
Does OptiFine improve FPS?
Yes. It can improve FPS by optimizing graphics and rendering. The results depend on your PC.
Which Java version is best for OptiFine 1.17?
Java 16 (64-bit) is recommended for Minecraft 1.17.
Can I use OptiFine 1.17 with Forge?
Yes. Just make sure your Minecraft, Forge, and OptiFine versions are compatible.
Does OptiFine 1.17 work on Mac?
Yes. It works on macOS with Minecraft Java Edition.
Does OptiFine 1.17 support Linux?
Yes. You can use it on Linux with a compatible Java installation.
How do I install shaders in OptiFine 1.17?
Open Options > Video Settings > Shaders, place the shader ZIP file in the shader folder, and enable it.
How do I update OptiFine 1.17?
Download the latest compatible version and install it like a new copy.
Why is OptiFine 1.17 crashing?
It may crash because of the wrong Java version, incompatible mods, shaders, or outdated graphics drivers.
Why won’t OptiFine 1.17 install?
The most common reasons are missing Java, the wrong Java version, or using the wrong Minecraft version.
Can I use HD resource packs with OptiFine 1.17?
Yes. It supports HD resource packs, including 64x, 128x, and higher.
Is OptiFine better than Sodium?
OptiFine is better for shaders and graphics features, while Sodium focuses on higher FPS and Fabric support.
How do I uninstall OptiFine 1.17?
Remove the OptiFine profile from the Minecraft Launcher. Your worlds will remain safe.
Which OptiFine version is best for Minecraft 1.17?
Use the latest stable version that matches your Minecraft version.
Can OptiFine 1.17 run shaders?
Yes. It supports popular shader packs like BSL, Complementary, SEUS, and Sildur’s.
Does OptiFine work with resource packs?
Yes. It adds support for connected textures, custom models, and other resource pack features.
Does OptiFine increase Minecraft loading speed?
It can improve loading and chunk rendering, but performance also depends on your hardware.
Can OptiFine reduce Minecraft lag?
Yes. It includes many settings that help reduce lag and improve performance.
Does OptiFine work on multiplayer servers?
Yes. It works on most servers because it only changes client-side graphics.
Can I use OptiFine with Fabric?
Not directly. Some versions work with OptiFabric, but compatibility may vary.
Does OptiFine support custom entity models?
Yes. It supports Custom Entity Models with compatible resource packs.
Does OptiFine support connected textures?
Yes. Connected Textures are built into OptiFine.
Can OptiFine run on low-end PCs?
Yes. It is designed to improve performance on older and low-end computers.
How much FPS can OptiFine add?
The FPS increase varies depending on your hardware and game settings.
Does OptiFine use more RAM?
No. However, shaders and HD resource packs may require additional RAM.
Why are my shaders running slowly?
Lower the shader quality, reduce render distance, or use lighter shader packs for better performance.
Can I install OptiFine without Forge?
Yes. The standalone OptiFine installer works without Forge.
Does OptiFine change Minecraft gameplay?
No. It only improves graphics, visuals, and performance.
Can I use OptiFine with Minecraft 1.17 modpacks?
Yes, if the modpack and OptiFine version are compatible.
Is OptiFine still updated?
Yes. It continues to receive updates for supported Minecraft versions.
Does OptiFine work with NVIDIA graphics cards?
Yes. NVIDIA GPUs work well with OptiFine and shaders.
Does OptiFine work with AMD graphics cards?
Yes. AMD graphics cards fully support OptiFine.
Does OptiFine work with Intel graphics?
Yes. It works on Intel integrated graphics and can improve performance.
Can I use OptiFine with Minecraft Java Edition only?
Yes. OptiFine is available only for Minecraft Java Edition.
What is the difference between OptiFine 1.17 and 1.17.1?
Each version is made for its matching Minecraft release. Always install the correct one.
Should I use OptiFine 1.17 in 2026?
Yes, if you still play Minecraft 1.17. For newer versions, other optimization mods may offer better compatibility.
Final Verdict: Is Minecraft OptiFine 1.17 Worth Using?
Minecraft OptiFine 1.17 remains one of the most complete optimization and graphics enhancement mods for Minecraft Java Edition. It improves FPS, expands graphics settings, supports shaders, and unlocks advanced resource pack features.
For players who enjoy Minecraft 1.17 worlds, OptiFine provides a simple way to improve both performance and visual quality.
Who Should Use OptiFine 1.17?
OptiFine 1.17 is a great choice for:
- Players with low-end or mid-range PCs.
- Minecraft Java Edition users.
- Shader enthusiasts.
- Builders using HD resource packs.
- Players who want advanced graphics controls.
- Users who prefer a simple installation process.
Main Strengths
The biggest advantages of OptiFine include:
- Significant FPS optimization.
- Built-in shader support.
- HD texture compatibility.
- Dynamic Lighting.
- Connected Textures.
- Zoom functionality.
- Advanced video settings.
- Better control over performance.
- Support for visual customization.
Its biggest strength is combining performance improvements and graphics enhancements into one easy-to-use mod.
Known Limitations
OptiFine also has some limitations:
- Some newer optimization mods provide higher FPS.
- Certain Fabric setups prefer modern alternatives.
- Heavy shaders still require powerful GPUs.
- Mod compatibility depends on versions.
- Some features require compatible resource packs.
Understanding these limitations helps you choose the right tool for your setup.